Cooking Guides and Tips

Top 5 Cast Iron Grill Pan Recipes

Discover the top 5 cast iron grill pan recipes that deliver perfect sear marks, smoky flavor, and restaurant-quality results right in your kitchen.

by Christopher Jones

Cast iron has been used for cooking for over 2,000 years, and it still outperforms nearly every modern pan on the market. Cast iron grill pan recipes give you deep sear marks, incredible heat retention, and bold flavors — all without leaving your kitchen. This guide covers 5 proven recipes you can make with your cast iron grill pan, plus step-by-step cooking instructions, troubleshooting fixes, and long-term care tips. By the end, you'll know exactly how to get the most out of this legendary piece of cookware.

Introduction
Introduction

A cast iron grill pan holds heat longer and more evenly than almost any other pan. Those raised ridges — the lines across the cooking surface — create grill marks while letting fat drip away from your food. The result is leaner, more flavorful meals that look and taste like they came off an outdoor grill.

Whether you're cooking with cast iron for the first time or you've had your pan for years, these recipes work. You'll find everything from simple grilled chicken breast to bold chili chicken with ginger. Let's get into it.

Why a Cast Iron Grill Pan Is Worth It

The Upsides You'll Love

Cast iron grill pans have a serious fan base — and once you cook on one, you'll understand why. Here's what makes them stand out:

  • Superior heat retention — Cast iron stays hot even when cold food hits the surface. You get a consistent cook every time.
  • Real grill marks — The raised ridges create restaurant-style char lines that look (and taste) impressive.
  • Versatile use — Start on the stovetop and finish in the oven. One pan, multiple techniques.
  • Naturally non-stick over time — A well-seasoned pan builds a slick surface that gets better with every use.
  • Lasts decades — According to Wikipedia's overview of cast-iron cookware, cast iron pans can last generations with proper care.
  • Works on any heat source — Gas, electric, induction, or campfire. It doesn't matter.

The Honest Trade-offs

It's not all perfect. Here's what you should know before you start:

  • Heavy — Most grill pans weigh between 5 and 8 pounds. That takes some getting used to.
  • Slow to heat up — Cast iron takes longer to preheat than stainless steel. Give it 3–5 minutes.
  • Needs proper care — You can't just throw it in the dishwasher. More on that below.
  • Not ideal for acidic foods — Tomatoes and citrus can strip your seasoning (the protective oil layer) if cooked too long.

5 Cast Iron Grill Pan Recipes You'll Make Again and Again

These are the recipes that prove what a cast iron grill pan can really do. Each one is packed with flavor and easy enough to make on a weeknight.

Grilled Chicken Breast

Grilled Chicken
Grilled Chicken

Simple, healthy, and endlessly adaptable. Grilled chicken breast on cast iron comes out juicy inside with a perfect crust outside. And if you end up with leftovers, check out this guide on the best way to reheat grilled chicken without drying it out.

  • 2 boneless, skinless chicken breasts
  • 2 tablespoons olive oil
  • 1 teaspoon garlic powder
  • 1 teaspoon smoked paprika
  • Salt and black pepper to taste

Pan-Grilled Salmon with Red Pepper Salsa

Pan Grilled Salmon With Red Pepper Salsa

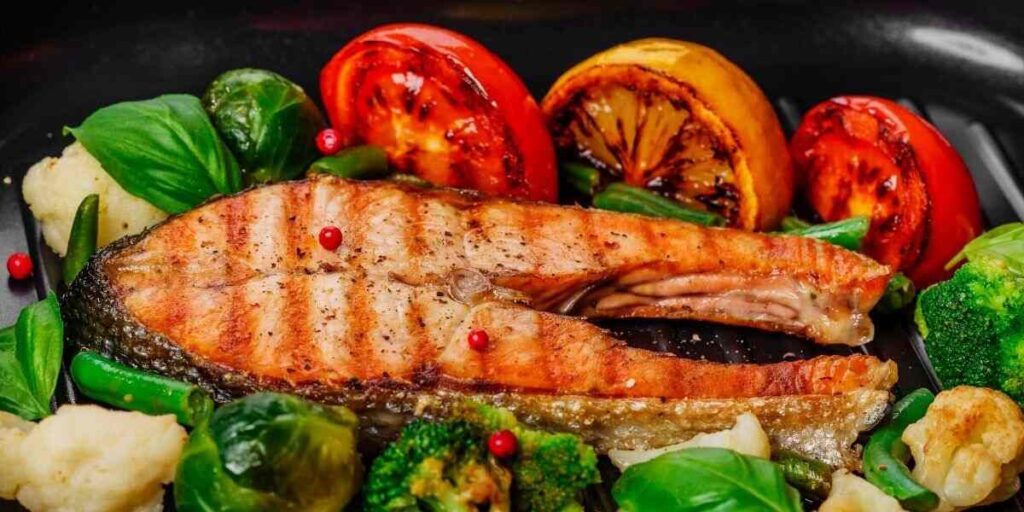
Salmon on a cast iron grill pan is a game-changer. High heat crisps the skin and locks in those natural omega-3-rich oils. Top it with a fresh red pepper salsa and you've got a dish that looks like it came out of a restaurant kitchen.

  • 2 salmon fillets, skin-on
  • 1 red pepper, finely diced
  • 1 small red onion, diced
  • Juice of 1 lime
  • Fresh cilantro, chopped
  • Salt, pepper, olive oil

Spiced Chicken Wrap

Spiced Chicken Wrap
Spiced Chicken Wrap

This one is built for meal prep. Grill up spiced chicken strips, slice them thin, and load into wraps with fresh veggies and yogurt sauce. Quick, filling, and better than takeout.

  • 2 boneless chicken thighs
  • 1 teaspoon cumin
  • 1 teaspoon turmeric
  • ½ teaspoon chili flakes
  • 2 large flour tortillas
  • Lettuce, cucumber, yogurt sauce

Chili Chicken with Ginger and Coriander

Chili Chicken With Ginger And Fresh Coriander

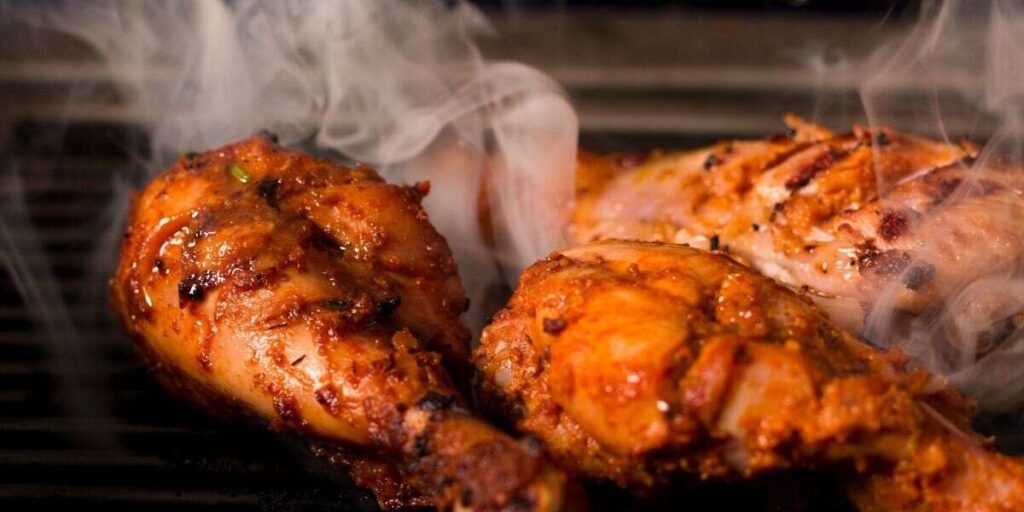
Bold, aromatic, and packed with heat. Fresh ginger and chili penetrate the chicken fast — even 30 minutes of marinating makes a serious difference. The cast iron char takes it to another level entirely.

  • 4 chicken drumsticks or thighs
  • 2-inch piece fresh ginger, grated
  • 2 red chili peppers, minced
  • 2 tablespoons soy sauce
  • 1 tablespoon sesame oil
  • Fresh coriander (cilantro) to serve

Charred Chicken with Scotch Bonnet

Charred Chicken With Intense Scotch Bonnet

For heat lovers only. Scotch bonnet peppers (one of the world's hottest chilis, measuring 100,000–350,000 Scoville heat units) create a marinade that's fruity, fiery, and unforgettable. The cast iron grill pan delivers the deep char that balances all that heat.

  • 4 chicken pieces (legs or thighs)
  • 1–2 scotch bonnet peppers, seeds removed
  • 3 garlic cloves
  • 1 tablespoon ground allspice
  • 2 tablespoons brown sugar
  • 2 tablespoons olive oil

How to Cook Each Recipe Step by Step

Prepping Your Ingredients

Good results start before the pan even gets hot. Follow these steps every time:

  1. Marinate your protein — Even 30 minutes makes a difference. Overnight is better for bold flavors.
  2. Pat food dry — Remove excess moisture with a paper towel. Wet food steams instead of sears.
  3. Bring to room temperature — Take chicken or fish out of the fridge 15–20 minutes before cooking. Cold food drops pan temperature fast.
  4. Preheat the pan — Place your cast iron grill pan over medium-high heat for at least 3–5 minutes before adding food.
  5. Oil the food, not the pan — Brush oil directly onto your food. Oiling the ridges causes smoking and burnt residue buildup.

Pro tip: Your cast iron grill pan is ready when a drop of water sizzles and evaporates on contact instantly — don't rush this step or your food will steam instead of grill.

Cooking Times and Heat Guide

Use this table as your go-to reference for every recipe in this guide:

Recipe Heat Level Cook Time Per Side Safe Internal Temp Rest Time
Grilled Chicken Breast Medium-High 6–7 minutes 165°F (74°C) 5 minutes
Pan-Grilled Salmon Medium-High 4–5 minutes 145°F (63°C) 2 minutes
Spiced Chicken Wrap Medium 5–6 minutes 165°F (74°C) 3 minutes
Chili Chicken with Ginger Medium-High 6–8 minutes 165°F (74°C) 5 minutes
Charred Scotch Bonnet Chicken High 5–6 minutes 165°F (74°C) 5 minutes

Beginner Habits vs. Pro Techniques

What Beginners Usually Do

Most people new to cast iron grill pan recipes make the same handful of mistakes. Here's what to avoid:

  • Moving food constantly — Cast iron needs time to build a crust. Leave it alone for the full cook time per side.
  • Not preheating long enough — A lukewarm pan means steaming, not grilling. Always allow 3–5 minutes.
  • Using too much oil — A thin coat is enough. Excess oil pools in the ridges and smokes excessively.
  • Skipping the rest period — Cutting into chicken right away lets all the juices escape. Always rest your meat.
  • Washing with dish soap — This strips the seasoning off your pan and causes sticking down the road.

What Experienced Cooks Do Differently

Once you've got the basics down, here's how to step up your cast iron cooking:

  • Start on the stovetop, finish in the oven — Get the sear on high heat, then transfer the whole pan to a 375°F oven to cook through without burning.
  • Rotate the pan mid-cook — If your burner has hot spots, rotate the pan 90 degrees halfway through for even grill marks.
  • Use a meat thermometer — Don't guess. A $10 instant-read thermometer tells you exactly when food is safe and perfectly done.
  • Deglaze for instant pan sauces — After cooking, add a splash of stock or wine to the hot pan and scrape up the browned bits (called fond). You've got a sauce in seconds.
  • Create crosshatch marks — Place food at 45 degrees to the ridges, then rotate 90 degrees halfway through cooking. You'll get a professional-looking diamond pattern.

Fixing Common Cast Iron Problems

Food Is Sticking to the Pan

Sticking is the most common frustration with cast iron. Here's what's causing it and how to fix it:

  • The pan isn't hot enough — Food releases naturally when it's properly seared. If it sticks, wait another 30–60 seconds before trying to flip.
  • The seasoning is worn down — A dull or rough surface means you need to re-season. See the care section below.
  • The food is too wet — Always pat food dry before it hits the pan. Moisture kills the sear.
  • Not enough oil on the food — You need a thin coat of high-smoke-point oil. Avocado or grapeseed oil both work great.

Uneven or Faint Grill Marks

If your marks look patchy or barely visible, here's what's going wrong:

  • Insufficient preheat time — Cast iron needs a full 3–5 minutes to heat evenly across the ridges.
  • Hot spots on your burner — Rotate the pan during preheat to distribute heat before adding food.
  • Pressing down on the food — Don't flatten your chicken or fish. Let the ridges do the work on their own.
  • Too much moisture in the marinade — Pat marinated proteins completely dry before placing them on the pan.

How to Season and Clean Your Cast Iron Grill Pan

Cleaning After Every Cook

Cast iron care is simpler than most people think. Here's the routine that keeps your pan in top shape:

  1. Let the pan cool slightly — Never plunge hot cast iron into cold water. It can warp or crack the metal.
  2. Scrub with a stiff brush — Use a brush or plastic pan scraper under warm water. Skip the dish soap.
  3. Dry completely — Towel dry first, then place the pan over low heat for 1–2 minutes to evaporate any remaining moisture.
  4. Apply a thin layer of oil — While still warm, wipe a small amount of neutral oil (vegetable, flaxseed, or grapeseed) over the entire surface.
  5. Store in a dry place — If stacking pans, place a paper towel between them to prevent moisture buildup and rust.

Re-Seasoning When Your Pan Needs It

You'll know it's time to re-season when your pan looks dull, feels rough, or food keeps sticking despite good technique. Here's how:

  1. Wash thoroughly with warm soapy water and scrub away any rust or old buildup.
  2. Dry completely in the oven at 200°F for 10 minutes.
  3. Apply a very thin coat of flaxseed oil or solid shortening all over — inside, outside, handle included.
  4. Place upside down in a 450°F oven for 1 hour.
  5. Let it cool in the oven. Repeat the process 2–3 times for a strong, durable seasoning layer.

Building a Long-Term Cast Iron Cooking Habit

Rotating Your Recipe List

The best way to get comfortable with cast iron grill pan recipes is to rotate a short list of favorites until they become second nature. Here's a simple weekly structure to start with:

  • Monday — Grilled chicken breast (quick, healthy, easy to dial in)
  • Wednesday — Chili chicken with ginger (bold flavor, minimal prep)
  • Friday — Pan-grilled salmon with red pepper salsa (impressive but fast)
  • Weekend — Scotch bonnet charred chicken (longer marinade, more depth)

Rotating like this means you'll master each recipe before moving on. You'll start to understand how your specific pan behaves — its hot spots, how long it needs to preheat, and the exact moment food is ready to flip. If you're batch-cooking and have steak nights in the rotation too, knowing the best way to reheat steak keeps your leftovers just as satisfying the next day.

Leveling Up Your Skills Over Time

Once you're confident with the 5 recipes above, here's where to push further:

  • Try grilling vegetables — zucchini, bell peppers, and asparagus cook beautifully in under 5 minutes.
  • Experiment with dry rubs instead of wet marinades for a different crust texture and deeper bark.
  • Attempt a reverse sear — cook protein slowly in the oven first, then finish with a high-heat sear on the cast iron for a perfectly even internal cook.
  • Add smoke by placing a small wood chip on your burner's open flame next to the pan — a simple indoor smoking technique that adds serious depth.
  • Move into fish beyond salmon — try halibut, swordfish, or even shrimp skewers on the grill pan for variety.

Frequently Asked Questions

Do I need to season a cast iron grill pan before using it for the first time?

Most new cast iron grill pans come pre-seasoned from the factory, so you can use them right away. That said, adding one or two extra seasoning layers before your first cook builds a stronger non-stick surface and sets you up for better results from day one.

What oil works best for cast iron grill pan recipes?

Use oils with a high smoke point — avocado oil (520°F), grapeseed oil (420°F), or refined vegetable oil all perform well at high heat. Olive oil works at medium temperatures but can burn at the high heat you need for good grill marks. Always brush the oil onto your food, not directly into the pan ridges.

Can I use a cast iron grill pan on an induction cooktop?

Yes, absolutely. Cast iron is magnetic, which means it works perfectly on induction cooktops. It's one of the few cookware materials that performs equally well on gas, electric, induction, and even an open campfire.

How do I get rid of rust on my cast iron grill pan?

Scrub the rust off with steel wool under warm water, then wash with a small amount of dish soap. Rinse thoroughly, dry completely in the oven at low heat, then re-season the pan at least twice before cooking again. A little surface rust is completely fixable and doesn't ruin the pan permanently.

Why is my cast iron grill pan smoking so much when I cook?

Excess smoke usually comes from too much oil on the food or old food residue burning off the ridges. Use only a thin coat of oil, clean the pan thoroughly after every use, and make sure your kitchen is properly ventilated whenever you cook at high heat on cast iron.

How long should I marinate chicken before these cast iron grill pan recipes?

A minimum of 30 minutes gives you solid flavor penetration. Overnight in the fridge is the sweet spot for the bolder recipes like scotch bonnet or chili ginger chicken. The key rule: always pat the chicken completely dry before it hits the pan, or excess marinade will cause steaming instead of searing.

Final Thoughts

Cast iron grill pan recipes reward you every single time you cook them — the more you use your pan, the better it performs. Start with the grilled chicken or salmon this week, get your technique dialed in with the cooking times table, and then work your way through the bolder flavors of chili ginger chicken and the scotch bonnet recipe. Head over to the full cast iron recipes collection to find even more ways to use your pan, and once you start cooking on cast iron regularly, you'll wonder how you ever managed without it.

Christopher Jones

About Christopher Jones

Christopher Jones holds an MBA from the University of San Francisco and brings a business-minded approach to kitchen gear evaluation — assessing products not just for performance but for long-term value, build quality, and real-world usability in everyday home cooking. He has spent years testing appliances, cookware, and kitchen gadgets with the same analytical rigor he developed in business school. At BuyKitchenStuff, he covers kitchen appliance reviews, buying guides, and practical cooking tips.

Check for FREE Gifts. Or get our Free Cookbooks right now.

Disable the Ad Block to reveal all the recipes. Once done that, click on any button below