by Rick Goldman
Learning how to make rice noodles at home is surprisingly simple — you need just two ingredients, rice flour and water, and about 30 minutes of hands-on time. Homemade rice noodles have a fresh, silky texture that store-bought versions can't match, and you get full control over thickness and width. Whether you're making pad thai, pho, or a quick stir-fry, fresh rice noodles elevate every dish. If you enjoy making things from scratch in your kitchen, this is one of the most rewarding projects you can try.
The process works a lot like making crepes. You mix a thin batter, steam it in a flat pan, peel off the sheet, and slice it into noodles. No fancy equipment required — just a non-stick skillet or a pie plate that fits inside a pot with a lid. Once you get the rhythm down, you can produce a full batch in under an hour. The technique is the same one used across Southeast Asia and southern China, where fresh rice noodle sheets (called hé fěn or bánh phở) are a daily staple.
If you've already tackled homemade pasta noodles, you'll find rice noodles even easier since there's no kneading or resting involved. Let's walk through everything you need to know.
Contents
Rice noodles originated in southern China and Southeast Asia, where rice paddies dominated the landscape and wheat was scarce. According to Wikipedia's overview of rice noodles, references to steamed rice sheets date back to the Qin dynasty over 2,000 years ago. The technique spread along trade routes into Vietnam, Thailand, Malaysia, and beyond, adapting to local tastes along the way.
What makes rice noodles unique is their gluten-free nature. Rice flour doesn't form the elastic protein networks that wheat flour does, so the noodles rely on starch gelatinization — heating the batter causes the starch granules to swell and bond into a flexible sheet. That's why steaming (not boiling) is the traditional method. The gentle, even heat sets the starch without tearing the delicate batter.
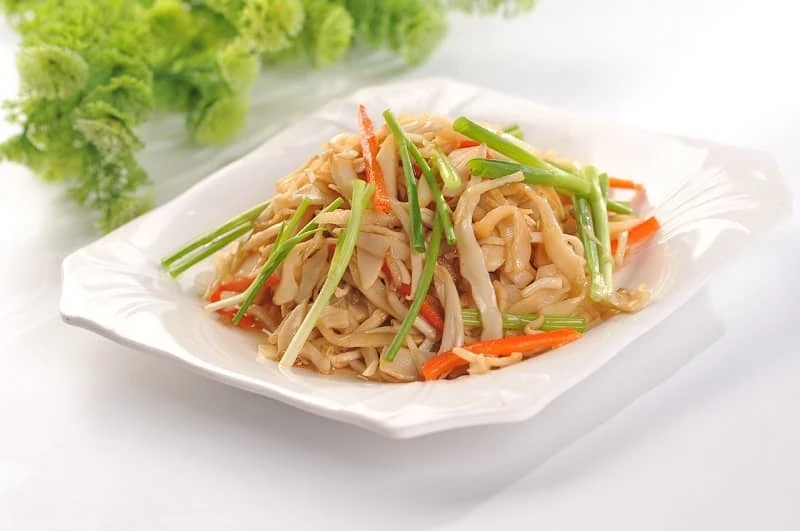
Today, rice noodles show up in dozens of iconic dishes: Vietnamese pho, Thai pad see ew, Chinese chow fun, Singaporean laksa, and Malaysian char kway teow. Each dish uses a slightly different noodle width, but the base recipe stays the same. Once you master the basic sheet, you can cut any width you want.
The ingredient list is short. You need rice flour (not glutinous rice flour — that's a different product), water, a pinch of salt, and optionally a teaspoon of tapioca starch or cornstarch for extra chewiness. For equipment, grab a non-stick skillet or a flat heat-proof plate, a pot large enough to hold that plate with a lid, a pastry brush, and neutral oil like vegetable or canola.
Use a kitchen scale if you have one. Rice flour absorbs water differently depending on the brand, so measuring by weight gives you consistent results every time.
Whisk together 1 cup (160g) rice flour, 1 tablespoon tapioca starch, ½ teaspoon salt, and 1½ cups (360ml) water until completely smooth. The consistency should be like heavy cream — thin enough to pour and swirl into a very thin layer. If it's too thick, add water a tablespoon at a time. Let the batter rest for 10 minutes so any bubbles settle out.
Pro tip: Stir the batter before ladling each sheet. Rice flour settles fast, and an uneven batter means noodles that are thick in some spots and paper-thin in others.
This amount of batter makes roughly 4–6 noodle sheets, enough for two generous servings. Double the recipe if you're feeding a family or want leftovers.
Bring about 2 inches of water to a boil in your pot. Lightly oil your plate or skillet. Give the batter a good stir, then ladle about 3 tablespoons onto the plate and tilt it to spread a thin, even layer — think crepe-thin, not pancake-thick.
Carefully set the plate on top of the boiling water (it should hover above the water, not sit in it). Cover with the lid and steam for 2–3 minutes until the sheet turns from opaque white to slightly translucent. You'll see it bubble up and pull away from the edges when it's done.
Remove the plate with tongs or a towel (it's hot), brush the top of the noodle sheet with a tiny bit of oil to prevent sticking, and let it cool for a minute. Then gently peel the sheet off. Stack finished sheets on a lightly oiled cutting board. Repeat with the remaining batter.
Once your sheets are cool enough to handle, roll each one loosely and slice crosswise with a sharp knife. Cut them ¼-inch wide for pho-style noodles, ¾-inch wide for pad see ew, or leave them as full sheets for cheung fun (stuffed rice rolls).
Fresh rice noodles are best used within a few hours. If you need to store them, toss them lightly with oil, seal them in an airtight container, and refrigerate for up to two days. They'll stiffen in the fridge, but a quick 30-second dip in boiling water or a few seconds in the microwave with a damp paper towel brings them right back.
You can also freeze the uncut sheets. Layer them between parchment paper, seal in a freezer bag, and they'll keep for about a month. Thaw in the fridge overnight before cutting. If you're someone who likes meal-prepping from scratch — similar to freezing hamburger buns for later use — this batch-and-freeze approach works well.
One of the best reasons to learn how to make rice noodles yourself is the cost savings. Here's what a typical batch costs using grocery store prices:
| Ingredient | Amount Used | Cost per Package | Cost per Batch |
|---|---|---|---|
| Rice flour | 1 cup (160g) | $3.50 / 4 lbs | $0.31 |
| Tapioca starch | 1 tablespoon | $3.00 / 1 lb | $0.04 |
| Salt | ½ teaspoon | $1.00 / 26 oz | $0.01 |
| Vegetable oil | 1 tablespoon | $4.00 / 48 oz | $0.06 |
| Total | $0.42 |
A package of dried rice noodles runs $2–4 at most grocery stores, and fresh rice noodles from an Asian market cost $3–5 per pound. Your homemade batch costs under 50 cents and produces noodles that taste noticeably better than both options. Over a month of weekly noodle dishes, that's roughly $10–18 saved — not life-changing, but meaningful if you're watching your grocery budget.
The real value isn't just money, though. You avoid the preservatives and additives found in many commercial rice noodles, and you can adjust the thickness and texture to match exactly what your recipe needs. Pair these fresh noodles with a homemade garlic sauce and you've got a restaurant-quality meal for a fraction of the price.
Fresh homemade rice noodles have a soft, silky chew that dried noodles simply cannot replicate. Dried rice noodles tend to turn mushy or gummy if you overcook them by even 30 seconds. Homemade noodles are far more forgiving — they hold up in stir-fries without falling apart, and they absorb sauces beautifully without getting waterlogged.
You also control exactly what goes in. Many store-bought rice noodles contain added cornstarch, sodium, or preservatives like sodium benzoate. When you make your own, the ingredient list stays clean. This matters if you're cooking for someone with food sensitivities or if you're simply trying to enjoy more balanced, whole-ingredient meals.
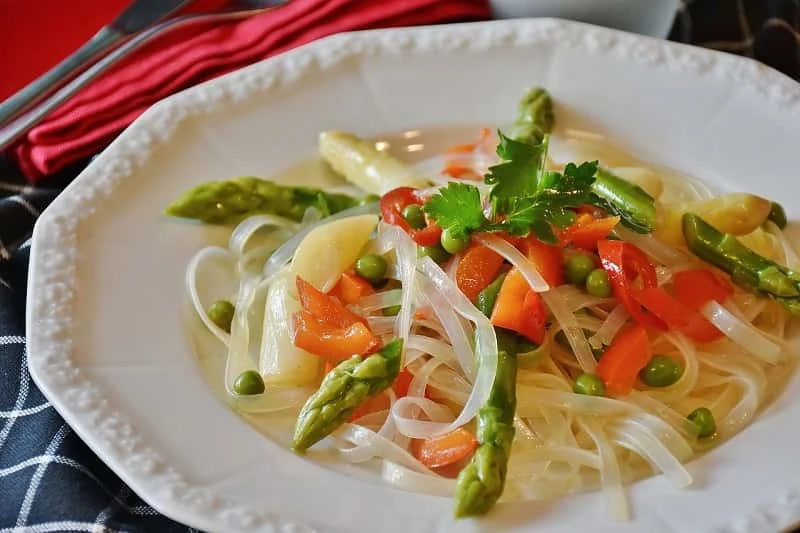
Customization is another big win. Want extra-wide noodles for chow fun? Just cut wider. Want them thin for soup? Slice finer. You can even add a splash of turmeric to the batter for golden noodles or blend in spinach for a green version.
Convenience is the obvious advantage. Dried rice noodles store indefinitely in your pantry and cook in 5–8 minutes. Making noodles from scratch takes about 40 minutes from mixing to cutting. If it's a busy weeknight and you just want dinner on the table fast, dried noodles are the practical choice.
Store-bought noodles also give you consistent results with zero learning curve. Your first few batches of homemade noodles might be uneven or too thick as you dial in the technique. That said, by your third or fourth attempt, you'll have the process down cold.
If your noodle sheets tear when you try to peel them off the plate, two things are likely happening. Either the sheet is too thin (use slightly more batter next time) or you didn't oil the plate well enough. A light but thorough coating of oil before every single sheet is non-negotiable.
If the noodles taste gritty or chalky, your batter wasn't mixed thoroughly. Rice flour clumps easily. Use a whisk, not a spoon, and make sure every last lump is gone before you start steaming. Some cooks even blend the batter for 10 seconds to guarantee smoothness.
Noodles sticking together is the other common complaint. The fix is simple: oil every surface generously. Oil the plate before pouring batter, oil the top of each finished sheet, and oil your knife or cutting board before slicing. Think of it like greasing a cake pan — a little prevention saves a lot of frustration.
If you notice your noodles lack chewiness, increase the tapioca starch to 2 tablespoons. Tapioca starch adds elasticity and that satisfying bouncy texture you get from restaurant-quality noodles. Some recipes go as high as a 3:1 ratio of rice flour to tapioca starch for maximum chew.
Once you're comfortable with the basic recipe, try these twists to keep things interesting. Replace up to a quarter of the water with coconut milk for a subtly sweet, fragrant noodle that pairs perfectly with Thai curries. Add a teaspoon of sesame oil to the batter for an earthy, nutty flavor that works great in cold noodle salads.
For a complete meal, toss your fresh noodles in a hot wok with vegetables, protein, and a splash of soy sauce and fish sauce. The fresh noodles pick up wok hei (that smoky charred flavor) much better than dried ones. If you're building a from-scratch dinner, these noodles go especially well alongside dishes like homemade pizza as part of an international spread for a dinner party.
You can also use the noodle sheets without cutting them at all. Spread hoisin sauce on a sheet, fill it with shrimp, scallions, and bean sprouts, then roll it up for a fresh rice noodle roll — a dim sum classic you can make right at home.
 |
 |
 |
 |

About Rick Goldman
Rick Goldman grew up traveling the Pacific Coast and developed an early appreciation for regional and international cuisines through exposure to diverse food cultures from a young age. That culinary curiosity shaped his approach to kitchen gear — he evaluates tools based on how well they perform across different cooking styles, ingredient types, and meal occasions. At BuyKitchenStuff, he covers kitchen equipment reviews, recipe guides, and food-focused buying advice.
Check for FREE Gifts. Or get our Free Cookbooks right now.
Disable the Ad Block to reveal all the recipes. Once done that, click on any button below
|
|
|
|
