by Rick Goldman
Can you really get fall-apart, melt-in-your-mouth brisket without a smoker? You absolutely can — and your oven is the secret weapon. Learning how to cook beef brisket in oven opens up one of the most rewarding meals you'll ever make at home. No fancy equipment, no babysitting a fire for twelve hours. Just your regular kitchen oven, a few simple tools, and some patience. Whether you're feeding a crowd on a Sunday afternoon or meal-prepping for the week, oven brisket delivers incredible flavor with minimal hands-on effort. This guide from our recipes collection walks you through every step — from picking the right cut to slicing it like a pro.

The beauty of oven brisket is consistency. Your oven holds a steady temperature without you watching it, and the enclosed heat does the hard work of breaking down tough connective tissue into juicy, tender meat. A well-cooked oven brisket rivals anything off a smoker — and it's far more forgiving for beginners.
Below you'll find everything you need: the right times and temperatures, a killer dry rub, a comparison of cooking methods, a full cost breakdown, and fixes for the most common mistakes. Let's get into it.
Contents
Oven brisket isn't always the answer, but it's the answer more often than most people think. Here's how to decide if your oven is the right tool for the job.
You should cook your beef brisket in the oven when:
The oven gives you precise temperature control that even expensive smokers struggle to match. You set it to 275°F and it stays at 275°F. No hot spots from wind, no temperature swings from opening the lid.
Be honest with yourself — if you're chasing a deep smoke ring and heavy bark, the oven won't deliver that. A smoker is the right tool for competition-style brisket. Also skip the oven if you're cooking a full packer brisket over 15 pounds, as most home ovens can't fit a roasting pan large enough. For those situations, you'll want an outdoor setup, maybe even in a space like the ones covered in our guide on how to build an outdoor kitchen.
Pro tip: You can get a hint of smoke flavor in your oven brisket by adding a teaspoon of smoked paprika to your dry rub and using a tablespoon of liquid smoke in your braising liquid.
Let's walk through the entire process of how to cook beef brisket in oven from start to finish. This method works every single time.
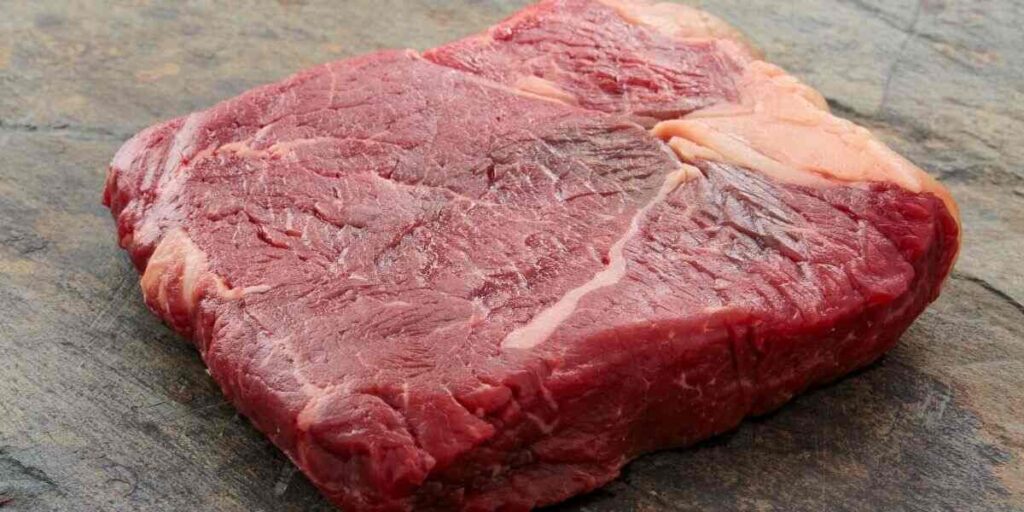
You'll find two main cuts at the store: the flat and the point. The flat cut is leaner and slices cleanly — it's what most people picture when they think of brisket. The point cut has more marbling (fat running through the meat) and is more forgiving if you overcook it slightly.
For oven cooking, I recommend a flat cut between 4 and 6 pounds. That's the sweet spot for most home ovens and feeds 8 to 10 people comfortably. Look for a brisket with a fat cap (the layer of white fat on one side) that's about a quarter-inch thick. Too thin and it won't protect the meat. Too thick and it won't render down properly.
A simple rub beats a complicated one every time. Here's what you need:
Mix everything together and coat the brisket generously on all sides. Pat it in firmly — don't just sprinkle. For the best results, apply the rub the night before and refrigerate uncovered. This lets the salt penetrate the meat and the surface dry out, which creates a better crust.
Here's the step-by-step method:
The resting step is not optional. Cutting into brisket right out of the oven is the number one reason people end up with dry meat. During rest, the juices redistribute throughout the brisket. If you're cooking large cuts in a convection oven, reduce the temperature by about 25°F since the fan circulates heat more aggressively.
People always ask whether the oven, smoker, or slow cooker makes the best brisket. The honest answer is they each excel at different things.
| Factor | Oven (275°F) | Smoker | Slow Cooker |
|---|---|---|---|
| Cook Time (5 lb flat) | 4–6 hours | 8–12 hours | 8–10 hours |
| Smoke Flavor | None (add liquid smoke) | Strong | None |
| Bark Formation | Moderate | Excellent | None |
| Tenderness | Excellent | Excellent | Very good |
| Hands-On Time | 20 minutes | 1–2 hours | 15 minutes |
| Equipment Cost | $0 (you have an oven) | $200–$2,000 | $30–$80 |
| Difficulty Level | Beginner-friendly | Intermediate | Very easy |
| Sliceability | Clean slices | Clean slices | Tends to shred |
For most home cooks, the oven wins on practicality. You get tender, sliceable brisket with almost no effort. The smoker wins on flavor complexity — there's no substitute for real wood smoke. The slow cooker is fine for pulled-style brisket but won't give you anything you can slice cleanly.
My recommendation: start with the oven method, master it, then explore smoking if you catch the bug. The fundamentals — temperature control, resting, slicing against the grain — transfer directly.
You don't need much to cook a great oven brisket, but the right tools make a real difference in your results.
Brisket has a reputation for being expensive, but when you break it down per serving, it's one of the most affordable ways to feed a group. Here's what a typical oven brisket dinner costs.
A whole flat cut runs between $5 and $8 per pound depending on your region and whether it's USDA Choice or Select grade. Let's calculate a 5-pound flat at $7 per pound.
After trimming and cooking, you'll lose about 30% to 40% of the raw weight. That 5-pound brisket yields roughly 3 to 3.5 pounds of cooked meat. At 6 ounces per serving, that's 8 to 9 generous servings for about $4.50 to $5.00 each.
Compare that to ordering brisket at a barbecue restaurant where a plate runs $18 to $25. You're saving 75% or more by doing it yourself. And you'll have leftovers for sandwiches, tacos, hash, and fried rice throughout the week.
Budget move: Buy brisket in bulk when it goes on sale (usually around major grilling holidays) and freeze the extras. Vacuum-sealed raw brisket keeps in the freezer for up to 12 months without quality loss.
If you're feeding a really large crowd — say 20 people — two briskets in the oven at the same time actually work fine. Just make sure there's an inch of space between the pans for air circulation, and add 30 minutes to your total cook time.
Even experienced cooks mess up brisket sometimes. Here are the most common problems and exactly how to fix them.
This is the complaint you'll hear most. Dry brisket almost always comes down to one of three causes:
If your brisket is already dry and you need to salvage it right now, slice it thin, lay the slices in a baking dish, pour warm beef broth over them, cover with foil, and heat at 250°F for 20 minutes. It won't be perfect, but it'll be moist and flavorful.
If one end of your brisket is perfect and the other is overdone, the problem is almost always that the thin end cooked faster than the thick end. Brisket flats taper — that's just how the muscle is shaped.
Solutions:
Another common issue is a soggy bottom. This happens when the brisket sits in too much liquid. Use just enough broth to cover the bottom of the pan — about half an inch. If the brisket releases a lot of juice, pour some off at the halfway point and save it for gravy.
Cooking brisket is a skill that improves with repetition. Here's how to level up your game systematically.
Don't try to do everything at once. Follow this progression:
Keep a simple log of each cook. Write down the weight, temperature, total time, resting time, and a rating out of 10. You'll start seeing patterns that help you dial in your perfect brisket.
Great brisket actually gets better as leftovers. The flavors deepen overnight and the reheating process can add new dimensions. Plan for leftovers — they're the bonus round.
Sliced leftover brisket reheats best in a 250°F oven with a splash of broth and a tight foil cover. Microwaving works in a pinch but dries the edges out. Store leftovers in an airtight container in the fridge for up to 4 days, or freeze for up to 3 months.
Set your oven to 275°F. This is the ideal temperature for breaking down the tough connective tissue in brisket without drying out the meat. Some cooks go as low as 250°F for a more gradual cook, but 275°F hits the best balance of tenderness and timing for most home ovens.
Plan for about 1 hour per pound at 275°F. A 5-pound flat takes roughly 4 to 6 hours. Always cook to temperature (195°F to 205°F internal), not to time. Every brisket is different — thickness, fat content, and your specific oven all affect the total cook time.
Fat-side up. As the fat cap renders during cooking, it bastes the meat below it and keeps it moist. The only exception is if your oven's heat source is on the bottom — in that case, fat-side down acts as a heat shield to protect the meat from drying out.
Yes, for most of the cook. Wrapping traps moisture and speeds up cooking through the stall (the point around 150°F to 170°F where evaporative cooling slows the temperature rise). Remove the foil for the last 30 minutes if you want a firmer crust on top.
Absolutely. Set your oven to 225°F, put the brisket in around 10 PM, and it'll be done by morning for a 5-pound flat. Use a leave-in probe thermometer with an alarm so it wakes you when the meat hits 200°F. This is one of the most hands-off ways to cook brisket.
Internal temperature of 195°F to 205°F, measured in the thickest part. But the real test is the probe test — when a thermometer probe slides into the meat with almost no resistance (like poking warm butter), it's done. Temperature is your guide, but tenderness is the final word.
A great brisket isn't about the fanciest equipment or the most complicated recipe — it's about patience, the right temperature, and knowing when to leave it alone.
 |
 |
 |
 |

About Rick Goldman
Rick Goldman grew up traveling the Pacific Coast and developed an early appreciation for regional and international cuisines through exposure to diverse food cultures from a young age. That culinary curiosity shaped his approach to kitchen gear — he evaluates tools based on how well they perform across different cooking styles, ingredient types, and meal occasions. At BuyKitchenStuff, he covers kitchen equipment reviews, recipe guides, and food-focused buying advice.
Check for FREE Gifts. Or get our Free Cookbooks right now.
Disable the Ad Block to reveal all the recipes. Once done that, click on any button below
|
|
|
|
