by Christopher Jones
Our team spent an entire Sunday afternoon ruining batch after batch of chocolate before finally nailing the technique. Seized ganache, streaky bark, dull truffles — we've experienced every frustrating outcome in the book. That hard-won experience is exactly why we're confident that learning how to temper chocolate microwave-style is one of the most practical skills any home baker can add to their repertoire. Properly tempered chocolate snaps cleanly, melts smoothly, and delivers that professional-grade glossy finish. Whether the goal is flawless chocolate bark, dipped strawberries, or molded bonbons, the microwave method makes high-quality results accessible — no marble slab, no double boiler, and far less cleanup. Explore our desserts category for recipe inspiration once this technique clicks.
Chocolate tempering is fundamentally a matter of crystal chemistry. When melted chocolate cools without guidance, cocoa butter forms a mix of unstable crystal types — the kind that bloom gray, crumble, or melt at room temperature. The goal of tempering is to guide the formation of Form V crystals exclusively, which produce the snap, sheen, and clean melt that define quality chocolate work. The microwave method achieves this through careful heat management and what's called the seeding technique — adding small pieces of already-tempered chocolate to the melted batch to introduce the correct crystal structure. According to Wikipedia's overview of chocolate tempering, cocoa butter can crystallize into six distinct forms, and only Form V delivers the results confectioners are after.
Our team has tested the microwave approach across dozens of batches using dark, milk, and white chocolate. The method is faster than traditional tabling, requires less equipment, and is far more repeatable once the core steps are understood. Below, we cover everything in detail: the right tools, a step-by-step process, an honest comparison to traditional methods, the most persistent myths, and the best real-world applications for microwave-tempered chocolate. For context on working with quality chocolate ingredients, our guide to the health benefits of dark chocolate is a useful companion read — understanding what makes good chocolate helps when selecting which bars to melt down.
Contents
Equipment choice shapes results before a single piece of chocolate is melted. Our team has found that most failed batches trace back not to technique errors, but to inadequate tools. Setting up correctly from the start removes the biggest variables.
The bowl is the single most important piece of equipment in this process. Our recommendations:
Our team also keeps a second smaller bowl on hand for holding the seed chocolate, pre-chopped and ready to add at the right moment.
Tempering lives and dies on precise temperatures. Most people who struggle with this process are guessing at temperature rather than measuring it. These are the target ranges our team works within consistently:
| Chocolate Type | Melt-Down Temp | Seeding/Working Temp | Final Use Temp |
|---|---|---|---|
| Dark Chocolate (70%+) | 122°F – 131°F (50–55°C) | 82°F – 84°F (28–29°C) | 88°F – 90°F (31–32°C) |
| Milk Chocolate | 113°F – 122°F (45–50°C) | 80°F – 82°F (27–28°C) | 84°F – 86°F (29–30°C) |
| White Chocolate | 104°F – 113°F (40–45°C) | 78°F – 80°F (26–27°C) | 82°F – 84°F (28–29°C) |
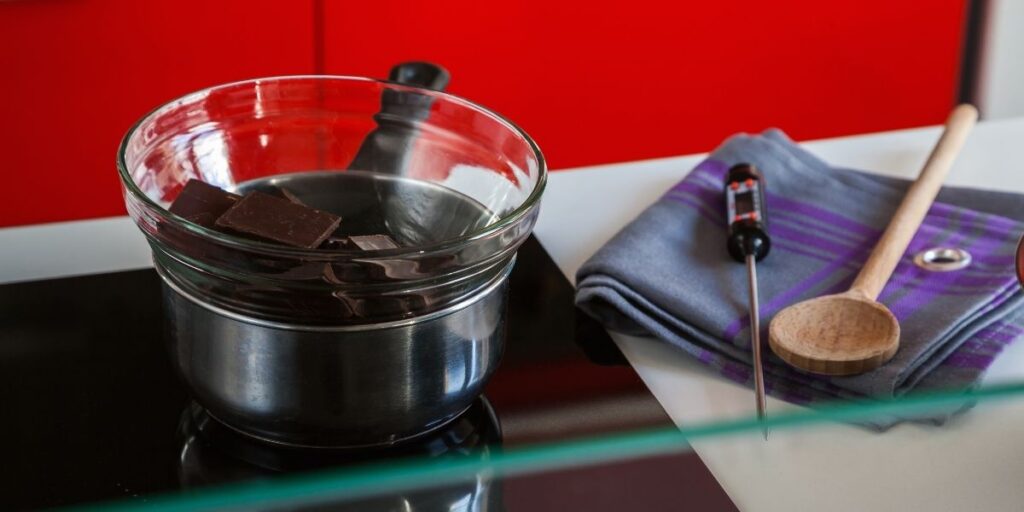
Our team uses a digital instant-read thermometer with a thin probe. Infrared surface thermometers are less reliable here — they measure surface temperature, not the bulk temperature of the chocolate mass.
A few more items that make the process significantly smoother:
This is the core of the guide. The microwave seeding method is our preferred approach for batches under 500 grams. It's reliable, repeatable, and faster than any traditional method once the habit is built.
Pro tip: If the chocolate cools below working temperature during the seeding phase, microwave it in a single 5-second burst at 50% power, stir immediately, and check again — patience here prevents restarting from scratch.
Never skip the temper test. Our team runs this check on every batch before committing to a full pour or dipping session.
The microwave seeding method is not the only way to temper chocolate — but our team considers it the best entry point for most home bakers. Here's an honest look at how it stacks up against the two main traditional approaches: tabling (pouring melted chocolate onto a marble slab) and double boiler seeding.
For confections that benefit from careful storage after creation — like chocolate-dipped lemon bars — our guide on how to store lemon bars properly covers the best methods for keeping chocolate coatings intact over time.

Several persistent misconceptions cause even experienced home bakers to produce inconsistent results. Our team has encountered all of these firsthand — and clearing them up is half the battle.
This is the most damaging myth in the space. Full-power microwaving scorches chocolate within seconds and destroys its cocoa butter structure permanently — no amount of stirring rescues burned chocolate. Fifty percent power is the standard for melting chocolate in a microwave, and some higher-wattage units benefit from dropping to 30–40% for the final stages. Our team recommends testing the microwave's actual heating behavior before committing to a batch by melting a small piece of chocolate alone and observing how quickly it responds.
Compound chocolate — the kind that replaces cocoa butter with vegetable fats — does not require tempering at all. It sets at room temperature regardless of how it's handled. This is convenient, but the product is inferior in taste, melt, and texture to real couverture. Most people use compound chocolate without realizing it, especially when melting inexpensive chocolate chips. Real tempering produces noticeably better results — that's the point of going through the process.
If a label lists palm oil, coconut oil, or hydrogenated vegetable oil as fats alongside or instead of cocoa butter, the product is compound and will not respond to tempering in any meaningful way. Our team always sources couverture chocolate from specialty baking suppliers or high-cocoa-percentage bars from grocery stores for this reason.
Some guides suggest using touch or visual cues alone — "if it feels slightly cool to the touch, it's ready." While experienced chocolatiers can read these signals, this approach fails most home bakers. The temperature windows for proper tempering are narrow — often just 4°F wide. A reliable digital thermometer eliminates guesswork entirely and is the single best investment for anyone serious about this process. Our team uses an instant-read thermometer on every batch, regardless of experience level.
Understanding how to temper chocolate microwave-style opens up a wide range of applications. The technique shines in specific contexts — and knowing which projects benefit most helps set realistic expectations.
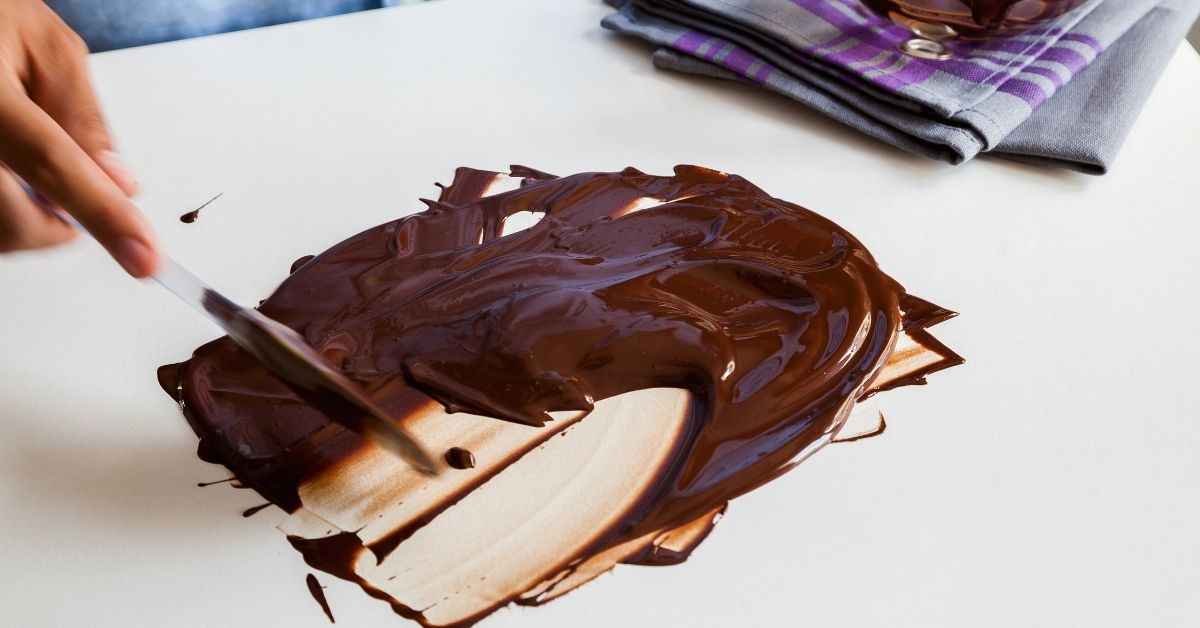
Bark is the ideal first project for anyone learning this technique. The process is forgiving, the result is impressive, and the format shows off tempered chocolate's best qualities — snap, gloss, and clean break.
Clusters follow the same logic — fold toasted nuts, cereal, or dried fruit into the tempered batch and drop by spoonfuls onto parchment. Simple, fast, and reliably beautiful when the chocolate is properly tempered.
Chocolate-dipped strawberries, cookies, pretzels, and truffles all benefit from properly tempered chocolate. The coating sets firm and snaps cleanly rather than staying soft and leaving fingerprints.
Polycarbonate molds produce the glossiest results from properly tempered chocolate — the Form V crystals contract slightly as the chocolate sets, releasing cleanly from the mold. Silicone molds work but produce a less glossy finish.
Our team's experience confirms that any microwave with adjustable power settings can be used effectively for tempering chocolate. The key requirement is the ability to set the microwave to 50% power or lower. Turntable models are preferable since they distribute heat more evenly, but even models without a turntable work with careful stirring between bursts. The microwave's wattage rating does matter — higher wattage units melt chocolate faster, so shorter burst intervals are needed.
When tempered chocolate cools below its working temperature during use, it thickens and becomes difficult to work with but is not ruined. Our team reheats it in 5-second microwave bursts at 50% power, stirring after each burst until it returns to working temperature. If it overheats above the upper limit, the temper is broken and the seeding process must be restarted. This is one reason our team always keeps extra seed chocolate nearby.
Chocolate bloom comes in two forms: fat bloom (gray streaks from unstable cocoa butter crystal migration) and sugar bloom (rough white coating from moisture exposure). Proper tempering prevents fat bloom by stabilizing the cocoa butter into Form V crystals. It does not prevent sugar bloom, which is caused by condensation — typically from refrigerating chocolate too aggressively or storing it in a humid environment. Our team recommends storing tempered chocolate confections in a cool, dry location in airtight containers rather than the refrigerator whenever possible.
Our team consistently uses 25–30% of the total chocolate weight as seed. For a 300-gram batch, that means reserving 75–90 grams as finely chopped seed pieces. Using too little seed means not enough Form V crystals are introduced to stabilize the batch, while too much can lower the temperature too quickly and make the chocolate unworkable before proper crystal formation occurs throughout the mass. The 25–30% range holds across dark, milk, and white chocolate types.
 |
 |
 |
 |

About Christopher Jones
Christopher Jones holds an MBA from the University of San Francisco and brings a business-minded approach to kitchen gear evaluation — assessing products not just for performance but for long-term value, build quality, and real-world usability in everyday home cooking. He has spent years testing appliances, cookware, and kitchen gadgets with the same analytical rigor he developed in business school. At BuyKitchenStuff, he covers kitchen appliance reviews, buying guides, and practical cooking tips.
Check for FREE Gifts. Or get our Free Cookbooks right now.
Disable the Ad Block to reveal all the recipes. Once done that, click on any button below
|
|
|
|
