by Rick Goldman
Last weekend, a friend called me in a panic — she had frozen scallops and guests arriving in an hour. She'd heard a dozen conflicting opinions about how to thaw scallops safely, and none of them agreed. The right method isn't complicated, but getting it wrong on an expensive seafood purchase is a painful lesson. For more kitchen guidance like this, explore the cooking tips section — it's packed with practical advice that saves you from common mistakes.
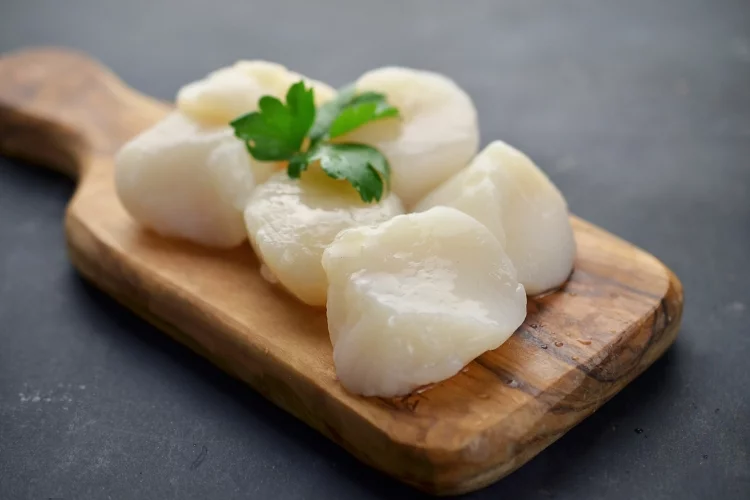
Scallops are one of the more unforgiving proteins to work with. They're high in moisture, delicate in texture, and carry a mild, sweet flavor that disappears fast when handled badly. Unlike a chicken breast that tolerates a rough thaw, scallops punish you immediately — excess water in the pan, a rubbery bite, and none of that golden crust you were hoping for.
This guide covers every reliable thawing method, what to avoid, and how to store your scallops before and after thawing so nothing goes to waste. Whether you have eight hours or twenty minutes, there's a method that fits your timeline.
Contents
There are three practical ways to thaw scallops: in the refrigerator, in cold water, or in the microwave. Each one has real advantages and real downsides. Knowing those trade-offs helps you pick the right method for your situation — not just the one you've always defaulted to.
The refrigerator method is the gold standard. You place your frozen scallops — still in the sealed bag — in a bowl or on a plate in the fridge and leave them overnight. They thaw slowly at a safe temperature (below 40°F / 4°C), which means no bacterial growth and no texture loss.
If you're planning a special dinner, this is always the right call. Move the bag to the fridge the night before and forget about it until you're ready to cook.

When you don't have eight hours, cold water thawing is your next best option. Submerge the sealed bag of scallops in a bowl of cold tap water. Change the water every 20–30 minutes so it stays cold. Most scallops thaw fully in 30–45 minutes this way.
Never use warm or hot water. It starts cooking the outer layer of the scallop while the center stays frozen — you end up with uneven texture and significantly higher bacterial risk.
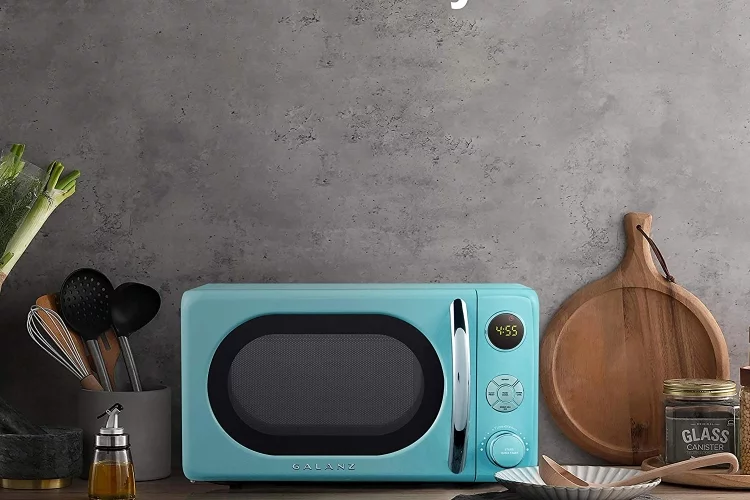
The microwave is a last resort. If you use it, set it to the defrost setting (20–30% power) and check the scallops every 30 seconds. This method can work, but it's easy to partially cook the edges while the center stays frozen. Cook immediately after microwaving — there's no safe window to let them sit afterward.
Using a microwave for delicate ingredients demands the same discipline as tempering chocolate in the microwave — low power, short bursts, and constant attention to avoid ruining the texture.
| Method | Time Required | Food Safety | Texture Result | Best For |
|---|---|---|---|---|
| Refrigerator | 8–12 hours | Excellent | Best | Planned meals |
| Cold Water | 30–45 minutes | Good (if water stays cold) | Good | Same-day cooking |
| Microwave | 2–3 minutes | Risky — cook immediately | Fair (often uneven) | True emergencies only |
| Room Temperature | 1–2 hours | Unsafe — never do this | Poor | Never |
Bad advice about thawing seafood spreads fast — especially in recipe comment sections and outdated cookbooks. A few of these myths are genuinely dangerous. Here's what you need to stop believing.
This is the most common mistake home cooks make. Warm water does thaw scallops faster, but it pushes the outer layer into the temperature danger zone (40°F–140°F / 4°C–60°C), where harmful bacteria like Vibrio — common in shellfish — multiply rapidly. According to the FDA's seafood handling guidelines, thawing seafood in warm water is not a safe practice. The fix is simple: cold water only, changed every 20–30 minutes to maintain a safe temperature.
Refreezing thawed scallops is only safe if they were thawed in the refrigerator and never left the safe temperature range. Even then, the texture suffers every time. Ice crystals form inside the muscle fibers during freezing and break them down — each cycle leaves you with a mushier, less appealing result. If you're regularly dealing with leftover portions, better portion planning is the real solution. The guide on reducing food waste covers practical strategies for buying and storing only what you'll actually use.
Thawing isn't always mandatory. Understanding when it matters gives you more flexibility without compromising the final dish.
Thaw your scallops before cooking when:
If scallops are the star of the plate — seared with butter and herbs, or served over risotto — always thaw them first. The difference in crust and texture is dramatic. Properly thawed, seared scallops pair beautifully with simple sides like steamed cauliflower, which you can prep while the scallops dry in the fridge.
In certain situations, cooking from frozen is genuinely acceptable:
Cooking from frozen adds roughly 50% more time and almost always produces a softer texture. It's a trade-off you make knowingly, not a shortcut that delivers the same result.
How you handle scallops before and after thawing shapes how they taste on the plate. This is where a lot of home cooks lose points without realizing it.
Frozen scallops keep well for up to three months at 0°F (-18°C) or below. After that, they're still safe but start losing flavor and developing freezer burn. Here's how to store them correctly:
For broader freezer organization strategies, the guide on how to store food in the freezer covers proper wrapping techniques, temperature management, and what to do when things start to pile up.
Once your scallops are thawed, cook them within 24 hours if thawed in the refrigerator — or immediately if thawed in cold water or the microwave. Do not let them sit in their own liquid. Pat them completely dry with paper towels before they ever touch the pan.
Excess moisture is the enemy of a good sear. Wet scallops steam instead of brown. The result is a pale, rubbery exterior instead of that caramelized crust everyone's after. If you've ever made bland, chewy scallops at home, this is usually the culprit. And if you're ever unsure whether any seafood is still safe, trust your instincts — reading about what to eat after food poisoning is not how you want to end a scallop dinner.
Thawing is just the beginning. These habits separate average scallops from exceptional ones.
Lay your thawed scallops on a paper towel-lined plate. Press another paper towel firmly on top. Then let them rest uncovered in the fridge for 20–30 minutes before cooking. This removes surface moisture that the first pat-down missed. Dry scallops brown in 90 seconds per side. Wet scallops take three minutes and still look pale.
Some cooks lightly salt the scallops after drying and leave them uncovered in the fridge for another 15 minutes — similar to dry-brining a steak. The salt draws out a bit more moisture while seasoning the flesh from within. It's a small step that pays off noticeably in the final dish.
Build your thaw timeline backward from when you plan to eat:
The principle of controlled, patient temperature management applies across many kitchen situations — even the careful approach needed when reheating frozen lasagna follows the same logic of not rushing a cold-to-hot transition.
Here's how the right thawing method plays out in actual situations — not just on paper.
You're making seared scallops with lemon butter for four people on Saturday night. On Friday evening, move your sealed bag from the freezer to the refrigerator. By Saturday afternoon, they're fully thawed with zero effort. Two hours before cooking, pat them dry and leave them uncovered on a plate in the fridge. When you're ready, a screaming hot cast iron pan delivers a perfect golden crust in under two minutes per side. This is how good restaurants do it every service — no shortcuts, just planning.
It's 6 PM and you forgot to thaw the scallops sitting in your freezer. Cold water method: fill a bowl with cold tap water, submerge the sealed bag, set a 20-minute timer. Swap the water once at the halfway mark. By 6:45 PM your scallops are thawed. Pat them very dry, heat your pan until it's smoking, and sear. Dinner is on the table by 7:10 PM without sacrificing quality — as long as you dried them well and got the pan hot enough.
No. Warm water pushes the outer layer of scallops into the temperature danger zone (40°F–140°F), where bacteria like Vibrio multiply rapidly. Always use cold tap water, and change it every 20–30 minutes to keep it at a safe temperature throughout the thawing process.
Scallops typically take 8–12 hours to thaw fully in the refrigerator. Moving them from the freezer to the fridge the night before is the most reliable approach — they're ready to cook by dinnertime the next day with no monitoring required.
Yes, in certain situations. Scallops added to soups, stews, or pasta sauces can go in from frozen — the liquid cooking compensates for extra moisture. For pan-searing, always thaw first. Frozen scallops release too much water for proper browning and will steam instead of sear.
Fully thawed scallops feel soft and pliable throughout with no hard or icy center. Gently press the thickest part — if it gives evenly with no resistance and no cold spots, they're ready to cook. The flesh should look opaque-white, not translucent or icy.
Only if they were thawed in the refrigerator and stayed below 40°F the entire time. Even then, expect noticeable texture loss — each freeze-thaw cycle breaks down the muscle fibers and results in a mushier texture when cooked. Avoid refreezing whenever possible.
Scallops thawed in the refrigerator are safe to cook within 1–2 days. Scallops thawed using the cold water or microwave method must be cooked immediately — there is no safe holding window after those methods, regardless of how cold your refrigerator runs.
 |
 |
 |
 |

About Rick Goldman
Rick Goldman grew up traveling the Pacific Coast and developed an early appreciation for regional and international cuisines through exposure to diverse food cultures from a young age. That culinary curiosity shaped his approach to kitchen gear — he evaluates tools based on how well they perform across different cooking styles, ingredient types, and meal occasions. At BuyKitchenStuff, he covers kitchen equipment reviews, recipe guides, and food-focused buying advice.
Check for FREE Gifts. Or get our Free Cookbooks right now.
Disable the Ad Block to reveal all the recipes. Once done that, click on any button below
|
|
|
|
