by Daisy Dao
Ever wondered how one small appliance can replace a whole stack of recipes? If you've been hunting for mini waffle maker recipes and don't know where to start, here's the short answer: this compact iron handles breakfast, lunch, dinner, and dessert — all in under five minutes per batch. Whether your mini waffle maker is fresh out of the box or has been sitting unused in a cabinet, there's a lot more potential waiting inside it. For even more kitchen inspiration, head over to the BuyKitchenStuff recipes page.

Mini waffle makers are compact, quick to heat, and easy to tuck away after use. That speed and simplicity is what makes them so popular — and also what makes them easy to underuse. Most people land on one or two go-to recipes and never push further. This guide is designed to change that. You'll get a breakdown of recipes by skill level, creative uses well beyond breakfast, fixes for common problems, care tips to extend your machine's life, and a simple approach for keeping your waffle rotation interesting over the long haul.
Let's start with some background and build from there.
Contents
The waffle has roots going back to medieval Europe, where flat iron plates were used to press batter over open flames. The modern electric waffle iron arrived in the early 20th century. The compact "mini" version followed as home cooks started looking for faster tools that fit smaller kitchens and tighter budgets — without sacrificing output.
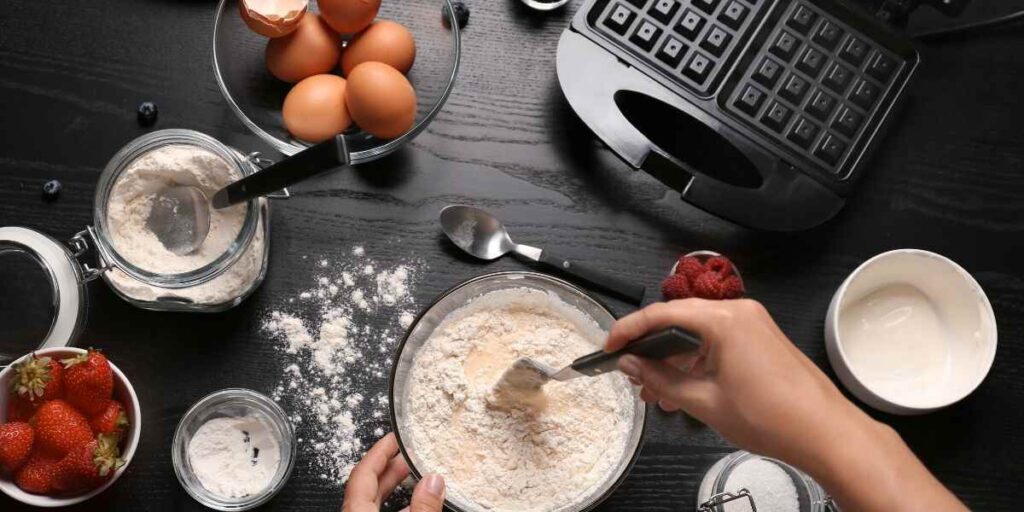
Today, mini waffle makers are a mainstream kitchen staple. They typically cook a 4-inch round or heart-shaped waffle in 3–5 minutes, use about ¼ cup of batter per batch, and clean up in a fraction of the time it takes to wash a pan. That combination of speed, low cost, and easy cleanup is what keeps them on counters everywhere.
Compared to a full-size waffle iron, the mini version offers a few real advantages:
It won't replace a full-size iron when you're feeding a crowd. But for one or two people, it's often the smarter, faster choice.
Not every recipe requires the same skill, and that's a good thing. Whether you're new to cooking or you've spent years in the kitchen, there's a range of mini waffle maker recipes that match where you are right now.
If you're just getting started, these four recipes are hard to mess up and require minimal ingredients:
Once you're comfortable with the basics, these recipes reward a little more effort and planning:
| Recipe | Skill Level | Cook Time | Key Ingredient |
|---|---|---|---|
| Classic Buttermilk Waffles | Beginner | 4 min | Buttermilk |
| Pancake Mix Waffles | Beginner | 3 min | Pancake mix |
| Scrambled Egg Waffles | Beginner | 3–4 min | Eggs + shredded cheese |
| Canned Biscuit Waffles | Beginner | 4 min | Refrigerated biscuit dough |
| Chaffles | Intermediate | 4 min | Mozzarella + egg |
| Yeast-Risen Waffles | Advanced | Overnight + 5 min | Active dry yeast |
| Brownie Waffles | Advanced | 5–6 min | Thick brownie batter |

One of the best things about mini waffle maker recipes is how far they stretch beyond the morning meal. Your iron is essentially a press that adds heat and texture — which means almost anything that cooks flat can go in it. That opens up a lot of territory.
Pro tip: Lightly brush the plates with oil before pouring in non-traditional batters like mashed potato or stuffing — they tend to stick more than standard waffle batter does.
Savory waffles work especially well as snacks, sides, and quick lunches. Here are some reliable options:


For dessert waffles, toppings matter as much as the batter itself. Learning how to temper chocolate in the microwave gives you a smooth, glossy drizzle that takes even the simplest waffle to the next level. And if you're adding nuts or crunchy toppings, knowing how to properly prepare toppings for baked goods — like toasting almonds — adds real depth without much extra effort.


Even straightforward recipes can go wrong. The good news is that most mini waffle maker problems trace back to a small number of causes — batter ratio, heat, and timing. Once you know what to look for, fixes are quick.
Warning: Never use metal utensils to pry a stuck waffle out — you'll scratch or chip the non-stick coating. Always use silicone or wooden tools.
A well-maintained waffle iron cooks more evenly and lasts longer. The good news: mini waffle makers are among the easiest kitchen appliances to clean, and a little consistency goes a long way.
A few extra habits protect your machine over the long run:
One of the easiest ways to stay excited about cooking is to cycle through recipes intentionally rather than defaulting to the same thing week after week. Your mini waffle maker is a surprisingly good anchor for that habit, because the barrier to trying something new is so low — it costs almost nothing in time or ingredients to experiment.
If you're new to the appliance, spend your first week on beginner recipes from the table above. Get a feel for your machine's timing and how much batter it takes. Then try one new recipe per week — savory one week, sweet the next. Within a month, you'll naturally have a shortlist of five to eight recipes you actually return to regularly.
A few strategies that experienced waffle makers swear by:
There's no single "right" long-term strategy. The real goal is simply to keep reaching for your mini waffle maker instead of letting it collect dust. A varied set of mini waffle maker recipes in your back pocket makes that easy and almost automatic.
Yes, pancake batter works well in a mini waffle maker. The result will be slightly softer than traditional waffle batter since pancake mix has less fat, but it's a great shortcut when you're short on time. Add a tablespoon of melted butter to the batter for extra crispiness if you want a crunchier edge.
Most mini waffle makers take about ¼ cup (4 tablespoons) of batter per waffle. Start slightly under that amount — you can always add a bit more next time. Overfilling causes batter to leak out the sides, which creates a mess and makes it harder to get the lid fully closed.
Watch the steam. When the steam coming from the iron slows down significantly or stops altogether, the waffle is usually done. Many mini waffle makers also have an indicator light that signals readiness. Avoid opening the lid too early — if the batter is still wet, it will split the waffle in half when you try to remove it.
For the very first waffle of each session, yes — even non-stick surfaces benefit from a light coat of cooking spray or melted butter. After the first waffle, the plates are usually conditioned enough to release cleanly. If you're making non-traditional recipes like hash browns or chaffles, grease before every batch since those mixtures stick more than standard batter.
Absolutely. Waffles reheat well in a toaster or in a 300°F oven for 5–8 minutes, staying crispy on the outside. Avoid microwaving them — microwaved waffles turn soft and lose their texture quickly. You can batch-cook a full week's worth on one day and store them in the refrigerator for up to 4 days, or freeze them for up to 2 months.
 |
 |
 |
 |

About Daisy Dao
Daisy Dao grew up in Honolulu, Hawaii, where coastal living and access to fresh local ingredients shaped her approach to home cooking from an early age. She has spent years experimenting with seafood preparation, healthy cooking methods, and ingredient substitutions — developing hands-on familiarity with a wide range of kitchen tools, techniques, and produce. At BuyKitchenStuff, she covers healthy recipes, cooking techniques, and ingredient substitution guides.
Check for FREE Gifts. Or get our Free Cookbooks right now.
Disable the Ad Block to reveal all the recipes. Once done that, click on any button below
|
|
|
|
