by Daisy Dao
Over 4.5 billion tortillas are consumed in the United States every single year, making them one of the most popular foods in the country — yet most home cooks have never tried making them from scratch. Finding the best flour tortilla press is one of the easiest ways to change that. A good press gives you consistently thin, even tortillas without the years of hand-rolling practice it takes to get there on your own. If you're building out your home kitchen setup, our kitchen gadgets section covers more tools worth knowing about.

A tortilla press works by squeezing a ball of dough between two flat plates connected by a hinged lever arm. Flour tortilla dough — made from wheat flour, a fat like lard or shortening, salt, and warm water — is stretchier than corn dough because of its gluten content. Gluten is the protein network in wheat that makes dough elastic. That elasticity means flour dough tends to spring back slightly after pressing, which is easy to manage once you know what to expect. If you're looking to stretch your grocery budget while cooking more at home, inspiration from cheap and easy healthy meals pairs naturally with homemade tortillas.
This guide covers the most common myths about flour tortilla presses, how to pick the right press for your experience level, a clear step-by-step walkthrough, a breakdown of every press type, how to keep your press in good condition, and how to fix the most frustrating problems that come up. Whether you're shopping for your first press or troubleshooting one you already own, you'll find practical answers here.
Contents
Before you invest in a press, it helps to clear up a few widely repeated ideas that might be giving you the wrong impression. Some of these myths stop people from buying a genuinely useful tool. Others create unnecessary frustration because cooks go in with the wrong expectations. Let's look at the two biggest ones.
This one is half-true. A rolling pin absolutely works for flour tortillas — home cooks across Mexico have been doing it that way for generations, and the results can be excellent. But a press gives you something a rolling pin genuinely can't: uniform thickness across the entire disc, every single time. When you roll by hand, some spots end up thicker than others. Thicker spots cook more slowly, so parts of your tortilla stay chewy or doughy while the thinner edges start to brown. With a press, the two flat plates apply equal pressure across the whole surface.
The speed difference also adds up quickly. Pressing a ball of dough takes about three seconds. Rolling it out evenly takes closer to thirty, and that's with practice. If you're making a dozen tortillas for a family dinner, that time difference matters. A press is also more forgiving for beginners — you don't need to develop rolling technique to get a decent result on your first try.
Some people assume that tortilla presses are strictly a corn tortilla tool, since corn dough (masa) is dense and hard to roll thin by hand. Flour dough is more pliable, so the thinking goes that extra help isn't necessary. That assumption misses the point. A press doesn't just help because the dough is hard — it helps with speed, consistency, and ease regardless of dough type. The one real difference is that flour dough often benefits from a brief final roll with a rolling pin after pressing, since the gluten springs back slightly. That extra step takes five seconds and is completely normal. You can read more about how corn-based ingredients differ from wheat in our guide to cornmeal substitutes, which covers a lot of the practical cooking differences between the two.
The right press isn't just about budget — it's about matching the tool to how often you plan to use it and what you want from your experience in the kitchen. Here's a straightforward way to think about it.
Start simple and inexpensive. A lightweight aluminum or plastic press costs between ten and twenty-five dollars and is perfectly capable for someone still learning the process. At this stage, the biggest variable in your tortillas isn't the press itself — it's your dough recipe. Getting the right ratio of flour to fat to water matters far more than press material. Focus there first. If you enjoy experimenting with kitchen gadgets in general, our roundup of the 10 best mini food processors covers another category of accessible tools that make home cooking more manageable. Once you've made tortillas a dozen times and know you genuinely love the process, you'll have a much clearer sense of whether you want to upgrade to something heavier and more durable.
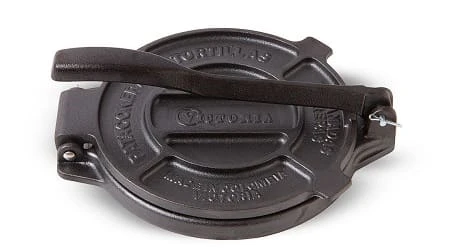
Cast iron is the standard choice for anyone who makes tortillas more than occasionally. The weight — typically four to eight pounds — does most of the work for you, so you need less force on the lever to get a well-pressed tortilla. Cast iron lasts essentially forever with basic care, which makes it a better long-term investment than budget alternatives that might crack or warp over time. If you're already comfortable with cast iron cookware from other applications — our guide on cast iron grill pan recipes is a good example of how versatile the material can be — then a cast iron press will feel intuitive from day one. If you prefer something lighter with more visual character, a handmade wooden press is also worth considering.
Once you have your press in hand, the process is straightforward. The biggest factors are your dough and how you prevent sticking — not the pressing motion itself, which takes about two seconds to learn.
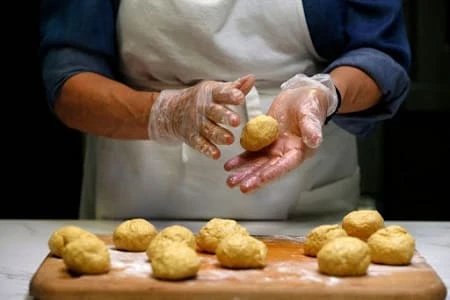
Combine two cups of all-purpose flour, half a teaspoon of salt, three tablespoons of fat (lard gives the best flavor, but shortening or butter work too), and about two-thirds of a cup of warm water. Mix until a rough dough forms, then knead for two to three minutes until smooth. Cover with a damp kitchen towel and let it rest for at least 20 minutes. This resting period is important — it lets the gluten relax so the dough stops fighting back when you press it. Think of it like resting bread dough before shaping: the patience pays off directly in the final texture. If you enjoy working with doughs in general, our cinnamon raisin bread recipe walks through similar principles for yeast-based doughs. After resting, divide your dough into balls roughly the size of a golf ball — about one and a half ounces each.
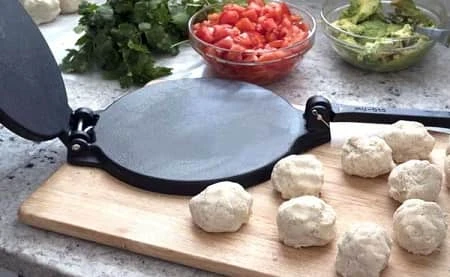
Cut a zip-lock bag into two flat sheets, or use parchment paper. Place one sheet on the bottom plate of your press, set a dough ball in the center, and lay the second sheet on top. This step is the most important tip in this entire guide — always use plastic or parchment between the dough and the plates. It prevents sticking without adding extra flour, which would toughen your tortilla. Close the press and push the lever down firmly with a smooth, steady motion.
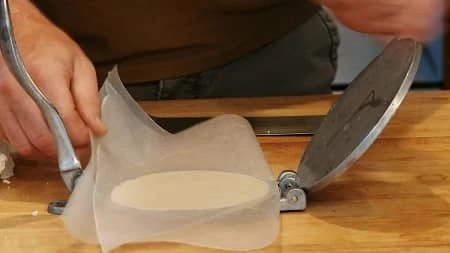
Open the press, peel off the top plastic layer, and flip the tortilla onto your palm. Then peel off the bottom sheet. Transfer it immediately to a dry, preheated skillet — cast iron works perfectly — over medium-high heat. Cook for 30 to 45 seconds per side until you see small brown spots forming. Stack your finished tortillas in a clean kitchen towel to keep them pliable. Homemade flour tortillas are remarkably versatile. Serve them with tacos, soups, wraps, or alongside a meal like our veggie tofu burger for a satisfying plant-based dinner.
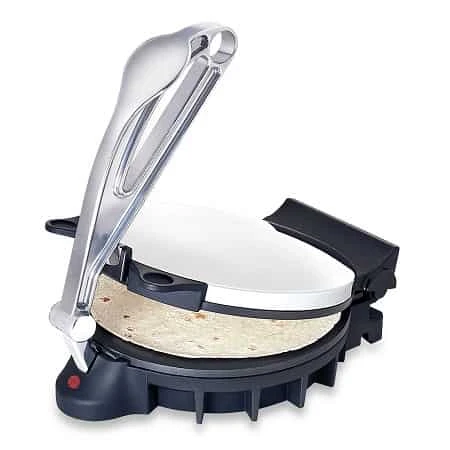
There are three main materials on the market: cast iron, wood, and plastic or lightweight aluminum. Each has real trade-offs depending on your kitchen, budget, and how often you cook. According to Wikipedia, tortilla presses have been used across Latin America for centuries and the basic two-plate design has changed very little since then. That simplicity is part of what makes them so reliable.
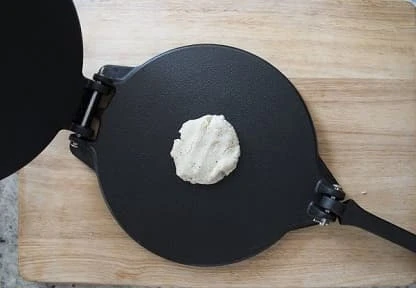
Cast iron is the most durable option and the one most often recommended for serious home cooks. The weight — usually four to eight pounds — means the lever requires less physical force from you to achieve full, even pressure. Once properly seasoned (coated with a thin layer of oil and heat-cured), cast iron develops a natural non-stick surface that improves with every use. The downsides are real: cast iron is heavy to store, can rust if left wet, and costs more upfront. But a well-maintained cast iron press can outlast almost any other kitchen tool you own.
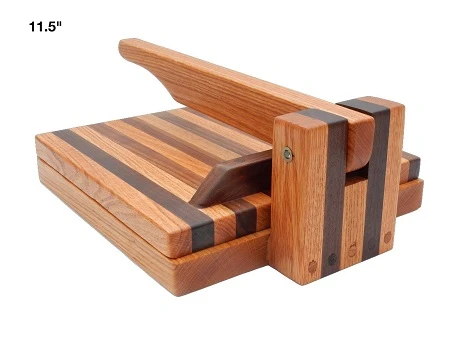
Wooden presses are lighter, often handmade, and bring a tactile warmth to the kitchen that cast iron doesn't. They won't rust, they're quieter to use, and they're easier to handle for cooks who find heavy tools uncomfortable. The trade-off is maintenance: wood is porous and absorbs moisture and oils over time. Without periodic oiling, it can dry out, crack, or warp. A wooden press is a great fit if you value craftsmanship and don't mind a little extra upkeep in exchange for a tool that feels genuinely special.
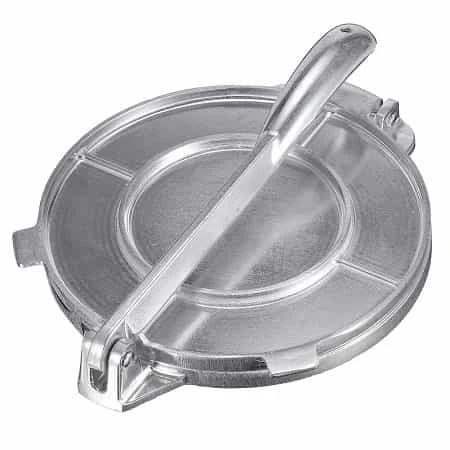
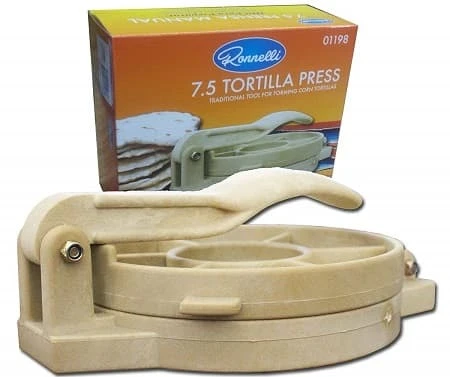
Plastic and lightweight aluminum presses are the most affordable option, typically running ten to twenty-five dollars. They're easy to clean, rust-proof, and light enough to store almost anywhere. For beginners or occasional tortilla makers, a plastic press is a completely reasonable starting point. The main limitation is durability — they can crack under heavy or frequent use — and they may not deliver quite as even pressure as a heavier press. Think of them as a low-commitment entry point rather than a lifetime purchase.
| Press Type | Weight | Durability | Maintenance Level | Best For | Typical Price |
|---|---|---|---|---|---|
| Cast Iron | 4–8 lbs | Excellent — lifetime use | Season regularly, dry immediately | Frequent use, serious cooks | $25–$60 |
| Wood | 1–3 lbs | Good with proper care | Oil periodically, avoid soaking | Occasional use, aesthetics | $20–$50 |
| Plastic / Aluminum | Under 1 lb | Moderate — may crack with heavy use | Low — often dishwasher safe | Beginners, infrequent use | $10–$25 |
A little regular maintenance makes a meaningful difference in how long your press lasts and how well it performs. The care requirements vary a lot by material, so it's worth knowing what your specific press needs before you use it for the first time.
Never submerge a cast iron press in water or put it in the dishwasher. After each use, wipe it down with a damp cloth or paper towel while still warm. If dough stuck to the surface, use a stiff brush and warm water with no soap — soap strips the seasoning you've built up over time. Dry the press immediately and completely; even a few minutes of moisture exposure can start surface rust. Then rub a very thin layer of cooking oil — vegetable, flaxseed, or lard all work — across all metal surfaces and let it air dry. This seasoning layer is what makes cast iron non-stick and protective, and it improves every time you cook. If you notice rust spots forming, scrub them off with a scrubby pad, rinse, dry, and re-season. For general tips on keeping cast iron surfaces clean in the kitchen, our guide on how to clean grease from your stove covers overlapping principles that apply here.
Wooden presses should never be soaked. Wipe them with a barely damp cloth after each use and let them air dry completely before storing. Every month or so, rub a food-safe mineral oil or beeswax conditioner into the wood grain to prevent cracking. Keep wood away from direct heat sources like stovetops or sunny windowsills, as rapid temperature changes can cause warping. For plastic presses, most are dishwasher safe, but hand washing is gentler on the hinge mechanism over time. Check the hinge screws occasionally — they can loosen with regular use and are easy to tighten with a standard screwdriver.
Even with the right press and the right technique, a handful of issues come up repeatedly. Here's what's usually causing them and what you can do about it.
Sticking is the most common complaint from new tortilla press owners, and it's almost always solved the same way: plastic wrap or parchment paper between the dough and both plates. Some people instinctively reach for flour to prevent sticking, but extra flour changes the texture of your tortilla and makes it tougher. If you're using a new cast iron press that hasn't been seasoned yet, sticking will be worse than normal — give it several uses with oil and it will improve noticeably. Also check your dough consistency. A slightly tacky dough is fine, but if it's actively sticky, add flour one tablespoon at a time until it just stops clinging to your hands. The dough itself is often the real culprit, not the press.
If your tortillas consistently come out thicker on one side, the most likely cause is where you're placing the dough ball. Try positioning it very slightly toward the hinge side of the plate — that area naturally receives a little less pressure from the lever. Experiment with placement across a few batches to see what works for your specific press. Pressing speed also matters: pressing down slowly and holding the lever for a full second before releasing gives more even results than a quick slam. Finally, remember that flour dough springs back due to gluten tension. If your tortilla seems too thick even after a firm press, let it rest on the counter for 30 seconds, then give it one light pass with a rolling pin.
Finding the best flour tortilla press for your kitchen comes down to how often you'll use it and how much you want to invest upfront — a plastic press is a smart starting point for beginners, while cast iron is worth every dollar if tortillas become a regular part of your cooking routine. Pick up a press, mix a simple batch of dough, and make your first batch tonight. Once you taste a warm, freshly pressed tortilla straight from the skillet, you'll understand exactly why it's worth the effort.
 |
 |
 |
 |

About Daisy Dao
Daisy Dao grew up in Honolulu, Hawaii, where coastal living and access to fresh local ingredients shaped her approach to home cooking from an early age. She has spent years experimenting with seafood preparation, healthy cooking methods, and ingredient substitutions — developing hands-on familiarity with a wide range of kitchen tools, techniques, and produce. At BuyKitchenStuff, she covers healthy recipes, cooking techniques, and ingredient substitution guides.
Check for FREE Gifts. Or get our Free Cookbooks right now.
Disable the Ad Block to reveal all the recipes. Once done that, click on any button below
|
|
|
|
