Kitchen Gadgets & Equipment Reviews ›
by Daisy Dao
Your carbon monoxide detector buying guide starts with one fact: not all detectors are equal, and the wrong one can fail you when it matters most. Carbon monoxide is odorless, colorless, and responsible for hundreds of deaths each year in the United States alone. If you have any gas-burning appliance in your home — a furnace, water heater, stove, or even a gas dryer — you need reliable CO detection. This guide walks you through exactly what to look for, what to avoid, and how to get the best protection without overspending. Whether you're replacing an expired unit or shopping for your first detector, check out our full carbon monoxide detector reviews for specific product recommendations alongside this guide.
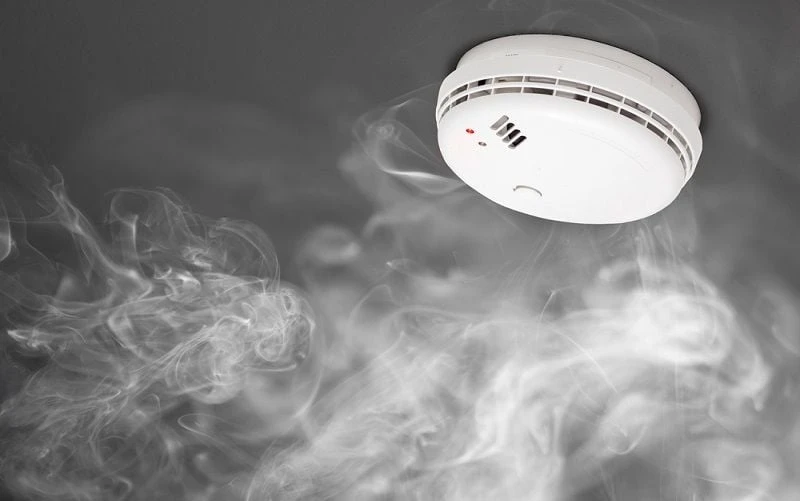
The tricky part about buying a CO detector isn't finding one — they're everywhere. The tricky part is knowing which features actually matter and which ones are just marketing fluff. Sensor type, display readout, interconnectivity, and battery backup all play a role. Get these right and you have genuine peace of mind. Get them wrong and you might as well tape a sticker to the wall.
Below, you'll find a complete breakdown of every decision you need to make, organized so you can move from zero knowledge to a confident purchase in one read.
Contents
Buying a CO detector shouldn't feel complicated, but the number of options on the shelf can paralyze you. Here's the straightforward process. Start with sensor type, then power source, then features — in that order. Everything else is secondary.
The sensor is the heart of any carbon monoxide detector, and electrochemical sensors are the only type worth buying for residential use. They respond faster, read lower concentrations more accurately, and last longer than semiconductor or biomimetic alternatives. Every fire department recommendation and UL-listed top performer uses electrochemical technology. Don't overthink this one.
Semiconductor sensors are cheaper but sluggish. They struggle to detect low-level CO exposure — the kind that causes headaches and confusion over weeks before anyone realizes something is wrong. Biomimetic sensors exist but are largely outdated. Stick with electrochemical.
You have three options: battery-only, hardwired with battery backup, or plug-in with battery backup. For most homes, hardwired units with sealed lithium battery backup give you the best of both worlds. They stay powered during outages and don't rely on you remembering to swap batteries.
Battery-only models work well in rentals or older homes without existing wiring. If you go this route, choose a unit with a sealed 10-year lithium battery. You'll replace the entire detector before the battery dies, which eliminates the dead-battery chirp problem entirely.
If your CO detector uses replaceable AA or 9V batteries, set a calendar reminder to test it monthly. Dead batteries are the number one reason detectors fail during an actual CO event.
A digital display showing real-time CO levels in parts per million is not optional — it's essential. Without it, your detector only tells you when concentrations hit dangerous thresholds. A digital readout lets you spot low-level leaks early, before they become emergencies. You want to know if your kitchen is sitting at 15 ppm after using the gas stove, even if that's below the alarm threshold.

Voice alerts that announce the type and location of the danger are a legitimate upgrade over basic beeping. When you're woken at 3 AM, a voice saying "Warning: carbon monoxide detected in the basement" is far more useful than a shrill chirp that sounds identical to a low-battery warning. Peak-level memory is another feature worth seeking out — it records the highest CO concentration detected since the last reset, which is valuable information for first responders and HVAC technicians.
Most CO detector failures aren't product failures — they're user failures. The device was installed wrong, maintained poorly, or simply too old to function. Here's what trips people up.
The single biggest mistake is mounting a CO detector right next to a gas appliance. This sounds logical — put the detector near the source — but it causes constant false alarms from normal combustion byproducts during startup. After a few false alarms, most people disable the detector or rip out the batteries. Now you have zero protection.
Mount detectors at least 15 feet from gas appliances and keep them away from bathrooms, where humidity triggers false readings. CO mixes with air fairly evenly, so wall-mounted at five feet height or on the ceiling both work. The key is having one on every level and near sleeping areas, not right on top of the furnace.
Every CO detector has a lifespan, typically five to seven years for most models and up to ten years for sealed-battery units. After that, the sensor degrades and the unit becomes unreliable. Flip your detector over right now — there's a manufacture date or expiration date printed on the back. If it's past due, it needs replacing today, not next month.
A CO detector past its expiration date is worse than no detector at all — it gives you false confidence that you're protected when you're not.
This is an area where people get complacent. The detector hasn't beeped in years, so they assume it's working. But the sensor chemistry wears out regardless of whether it's ever detected CO. Treat the expiration date like a hard deadline.
Your carbon monoxide detector buying guide wouldn't be complete without an honest comparison of available sensor technologies. Each has legitimate trade-offs.
These are the gold standard. An electrochemical sensor uses a chemical solution that generates a measurable electrical current when CO is present. The response is proportional to concentration, meaning these sensors can tell you whether you're dealing with 30 ppm or 300 ppm. They're accurate down to low single-digit ppm levels and have minimal cross-sensitivity to other household gases.
The downside is cost — electrochemical detectors run $30 to $80, compared to $15 for basic semiconductor models. That price difference is entirely worth it. According to the Consumer Product Safety Commission, electrochemical sensors are recommended for residential CO detection due to their accuracy and reliability.
Biomimetic sensors use a gel that changes color when exposed to CO, triggering an optical alarm. They're cheap but slow, sometimes taking hours to respond to low concentrations. Semiconductor sensors use a tin dioxide film that changes resistance in the presence of CO. They're faster than biomimetic but less accurate than electrochemical, especially at low concentrations where early detection matters most.

| Feature | Electrochemical | Semiconductor | Biomimetic |
|---|---|---|---|
| Accuracy at low ppm | Excellent | Fair | Poor |
| Response time | Fast (seconds–minutes) | Moderate (minutes) | Slow (minutes–hours) |
| Typical lifespan | 5–10 years | 5–7 years | 2–5 years |
| Price range | $30–$80 | $15–$35 | $15–$25 |
| False alarm rate | Low | Moderate | Low |
| Digital ppm readout | Common | Rare | Not available |
| Best use case | Primary home protection | Budget supplemental | Not recommended |
The table makes the choice obvious. Electrochemical wins in every category that matters for safety. Semiconductor models can serve as supplemental detectors in low-risk areas, but they shouldn't be your primary line of defense.
Owning a good detector means nothing if it's in the wrong spot. Placement determines whether you get a timely warning or sleep through a dangerous buildup.
At minimum, you need one CO detector on every level of your home, one near the primary sleeping area, and one near any attached garage. If you have a basement with a furnace or water heater, that's a mandatory location. Same goes for any room with a gas fireplace. For homes with multiple bedrooms on the same floor, a single hallway unit within 10 feet of bedroom doors covers everyone.
If you're shopping for a radiant floor heating system or any gas-fired water heater, make sure the room housing that equipment has its own dedicated CO detector. These appliances are common CO sources when venting gets blocked or heat exchangers crack. The detector should be in the same room but mounted away from the unit itself — 15 feet minimum, on a wall at roughly breathing height.
Kitchens are a special case. Gas stoves and ovens produce CO during normal operation, typically at harmless levels. But a poorly vented kitchen or a malfunctioning burner can push concentrations into dangerous territory. The challenge is placing a detector close enough to catch a real problem without triggering on every time you use the stove.

Mount the kitchen detector at least 15 feet from the stove, ideally in an adjacent hallway or dining area. If your kitchen opens directly to a living space, placing the detector in that shared zone works well. And while you're thinking about kitchen safety, keeping your appliances clean and well-maintained matters too — proper ventilation is just as important as detection. If you use convection ovens or other high-heat appliances alongside gas burners, adequate airflow becomes even more critical.
You can spend anywhere from $15 to $150 on a carbon monoxide detector. Here's what each price tier actually gets you and where the smart money goes.
Under $25 gets you a basic battery-powered unit with a semiconductor sensor and no display. It'll beep if CO levels get high enough, but you're flying blind on actual concentrations. The $30 to $50 range is the sweet spot — this is where you find electrochemical sensors, digital displays, 10-year sealed batteries, and peak-level memory. For most households, a $40 detector checks every important box.
Above $50, you're paying for smart home integration (Wi-Fi, app alerts, voice assistant compatibility) and combination smoke/CO units. These are worthwhile if you want phone notifications when you're away from home or if you're building an interconnected system where one alarm triggers all units. But the core CO detection at $40 is identical to the $120 smart model — you're paying for connectivity, not better sensing.
Budget for replacement, not just purchase. A $40 detector replaced every seven years costs you about $5.70 per year of protection. That's absurdly cheap for a life-safety device. The real cost trap is buying cheap detectors that need replacing every three to five years — you end up spending more over time while getting worse protection year after year.
If you go hardwired, factor in electrician installation costs of $50 to $150 per unit unless you're comfortable with basic electrical work. Interconnected systems require compatible wiring or wireless linking modules, which can add $15 to $30 per detector. For a typical three-bedroom home, budget $120 to $200 for a complete setup using quality battery-powered units, or $300 to $500 for a hardwired interconnected system professionally installed.
Spending $40 per detector on electrochemical sensors is the single best safety investment in your home — cheaper than a dinner out, and it lasts seven to ten years.
Buying the right detector is step one. Keeping it functional over its entire lifespan is where most people drop the ball. A good long-term strategy takes five minutes per month and saves you from the slow creep of complacency.
Press the test button once a month. That's it. The test verifies the alarm circuit, speaker, and battery. It takes three seconds. If the alarm doesn't sound or sounds weak, replace the batteries immediately — or replace the entire unit if it has a sealed battery. Write the installation date on the back of every detector with a permanent marker so you never have to guess whether it's expired.

Replace all CO detectors by their expiration date, no exceptions. If you moved into a home and don't know when the detectors were installed, replace them all now. The cost is trivial compared to the risk. Vacuum the detector's vents every six months to prevent dust accumulation, which can slow sensor response times or cause nuisance alarms.
Your home maintenance routine should include detectors alongside other safety items. Just like you'd inspect your kitchen cabinet liners and other home essentials periodically, CO detectors deserve a spot on your regular checklist.
Smart CO detectors that send alerts to your phone are worth considering if you travel frequently, have a vacation home, or want whole-house interconnection without running wires. The Nest Protect and First Alert Onelink are the two most proven options in this category. They alert your phone anywhere you have internet, tell you exactly which room detected CO, and can be silenced from the app during false alarms.
The upgrade makes the most sense when your current detectors are due for replacement anyway. Don't rip out working units just to go smart. But when replacement time comes, spending the extra $40 to $60 per unit for smart connectivity is a reasonable investment, especially for families with kids or elderly members who might not hear or respond to a standard alarm quickly enough.
One underrated feature of smart detectors is historical data logging. You can review CO readings over time and spot patterns — maybe levels creep up every time the furnace kicks on, suggesting a developing heat exchanger problem. That kind of insight turns your detector from a reactive alarm into a proactive diagnostic tool.
Replace your CO detector by the expiration date printed on the unit, which is typically five to seven years for standard models and up to ten years for sealed-battery electrochemical units. Even if the detector appears to work, sensor accuracy degrades over time and an expired unit cannot be trusted to respond correctly during a real CO event.
No. Carbon monoxide detectors sense CO, which is a byproduct of incomplete combustion. They do not detect natural gas (methane) or propane leaks before ignition. For gas leak detection, you need a separate combustible gas detector or a combination unit specifically rated for both CO and natural gas.
Mount it on the wall at roughly five feet from the floor, or on the ceiling. Position it at least 15 feet away from any gas appliance but within 10 feet of the bedroom door. The goal is catching CO that drifts into sleeping areas while avoiding placement that triggers false alarms from normal appliance operation.
Battery-powered and plug-in models with battery backup will continue working during a power outage. Hardwired models without battery backup will not. Since power outages sometimes coincide with CO risks — people running generators or using gas stoves for heat — battery backup is a critical feature to prioritize.
Sustained exposure to 50 ppm or higher causes symptoms in healthy adults within eight hours. At 150 ppm, headaches and dizziness start within one to two hours. Levels above 400 ppm are life-threatening within three hours. UL-listed detectors are required to alarm at 70 ppm within 60 to 240 minutes, but a digital display helps you catch lower concentrations early.
Combination units are convenient because they reduce the number of devices on your ceiling, but they're a compromise. When one sensor expires before the other, you replace both. If your home already has hardwired smoke detectors, adding standalone CO detectors gives you more flexibility and independent replacement cycles. For new installations, combination units with electrochemical CO sensors are perfectly acceptable.
A single chirp every 30 to 60 seconds almost always indicates a low battery or an expired unit — not a CO emergency. A true CO alarm produces a continuous pattern of four beeps followed by a pause, repeated. Check the battery first. If the chirping continues with fresh batteries, check the expiration date. If the unit is expired, replace it immediately.
The best carbon monoxide detector is the one that's properly placed, not expired, and has a working battery — everything else is just a bonus.
 |
 |
 |
 |

About Daisy Dao
Daisy Dao grew up in Honolulu, Hawaii, where coastal living and access to fresh local ingredients shaped her approach to home cooking from an early age. She has spent years experimenting with seafood preparation, healthy cooking methods, and ingredient substitutions — developing hands-on familiarity with a wide range of kitchen tools, techniques, and produce. At BuyKitchenStuff, she covers healthy recipes, cooking techniques, and ingredient substitution guides.
Check for FREE Gifts. Or get our Free Cookbooks right now.
Disable the Ad Block to reveal all the recipes. Once done that, click on any button below
|
|
|
|
