by Daisy Dao
Learning how to make fruit kabobs takes about five minutes to understand — and the actual prep takes fifteen. You pick your fruit, cut it into chunks, and slide it onto a skewer. No cooking, no complicated technique, no prior kitchen experience required. If you're looking for a snack that kids will genuinely get excited about, this is your answer. Browse our recipes collection for more crowd-pleasing ideas like this one.

The appeal is obvious. Fruit kabobs look colorful and fun, they're naturally sweet, and putting food on a stick makes kids feel like they're eating something special. Parents love them because there's almost no cleanup, the ingredients are cheap, and you can customize them based on what's in season or what your kid actually likes.
This guide covers everything: which fruits work best, what tools you need, how to keep skewers safe for small hands, and how to make fruit kabobs impressive enough for a party without spending more than 20 minutes on them.
Contents
Before we get into the finer details, here's the core process laid out plainly. Knowing how to make fruit kabobs at a basic level takes under a minute to learn. Everything else in this guide is about making them better, safer, and more fun — but the foundation is genuinely simple.
Start with fruits that are firm enough to stay on a skewer without falling apart. Strawberries, grapes, melon chunks, pineapple, and kiwi are your core options. Avoid anything too soft or too juicy — that's covered in detail later. The goal at this stage is a mix of at least three colors, because visual variety is what gets kids interested before they even take a bite.
Once your fruit is cut and dried, assembly is straightforward. Lay out your skewers and slide the pieces on in whatever order you like. Alternate colors and shapes as you go — you don't need a rigid pattern, just avoid putting the same fruit twice in a row. That one small detail makes the finished kabob look polished without any extra effort. A typical skewer holds 5–7 pieces of fruit comfortably without getting too heavy for small hands.
If you're serving these immediately, you're done. If you're making them ahead, refrigerate in an airtight container and hold off on adding any dip until right before serving.
Pro tip: Soak wooden skewers in water for 10 minutes before use — this keeps splinters from catching on the fruit and makes sliding pieces on much smoother.
You don't need a fully stocked kitchen to make fruit kabobs, but having the right tools on hand makes the process faster and cleaner. Most of what you need is probably already in your drawers.
This is the most important equipment decision when making these for kids. Plastic skewers with rounded or blunt tips are the safest choice for young children. Wooden bamboo skewers are cheap and widely available, but the sharp tips are a genuine hazard for little hands and mouths.
For birthday parties and larger gatherings, wooden skewers are the practical choice because they're cheap enough to throw away after. For everyday snacks with young children, invest in a pack of plastic reusable ones — they pay for themselves quickly.
Beyond skewers, you just need a few basics to make the process smooth:
If you want to get more out of your fruit beyond kabobs, our guide on how to use a food dehydrator to preserve fruits, vegetables, and meat covers another practical way to make fruit snacks last longer and reduce waste.
Not every fruit belongs on a skewer. The wrong choices lead to kabobs that fall apart, drip everywhere, or look unappetizing after sitting out for twenty minutes. Firm, bite-sized fruit is always your starting point — everything else is secondary.
According to the CDC's nutrition resources on fruits and vegetables, increasing fruit intake — even through fun formats like kabobs — leads to measurable improvements in children's diet quality. That's useful context when you're trying to convince a picky eater.
These are your core options. All of them are firm enough to stay on a skewer, look great in a color mix, and taste good at room temperature for at least an hour:
Some fruits are bad kabob candidates no matter how much you want to include them. Here's what to watch out for:
For keeping prepped fruit fresh before it hits the skewer, our food storage tips guide covers exactly how to store cut fruit to maintain texture and prevent early browning or moisture loss.
The basic kabob is already pretty appealing to kids. But a few extra touches push it from "sure, I'll have one" to "can I make my own?" Getting kids involved in the assembly process is the single biggest upgrade you can make. When they build their own kabobs, they eat them — every single time, without negotiation.
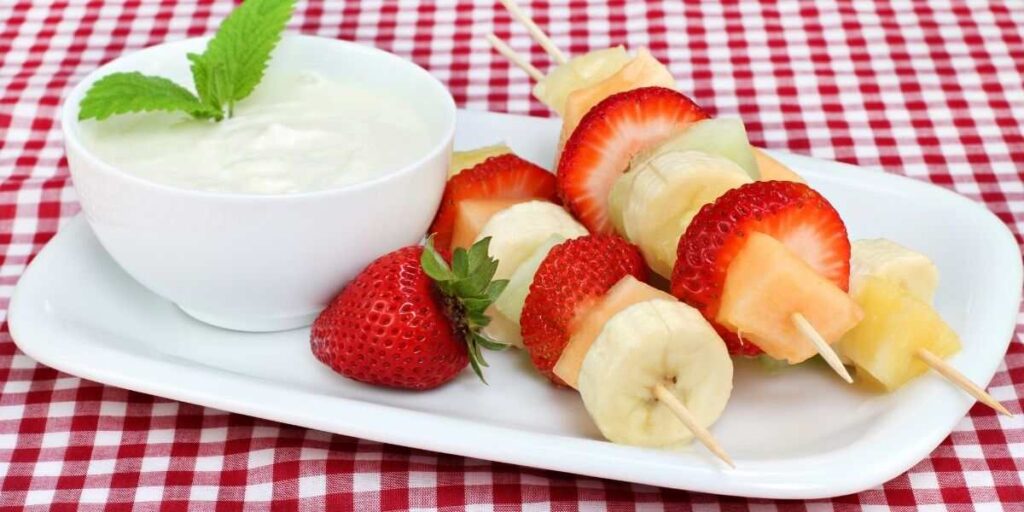
A dip turns a simple fruit skewer into something that feels special. These are the options kids consistently respond to best:
If you want to keep things on the healthier side, go with the yogurt-honey dip. It adds protein, keeps sugar low, and kids rarely notice the difference from the more indulgent versions when it's presented well.
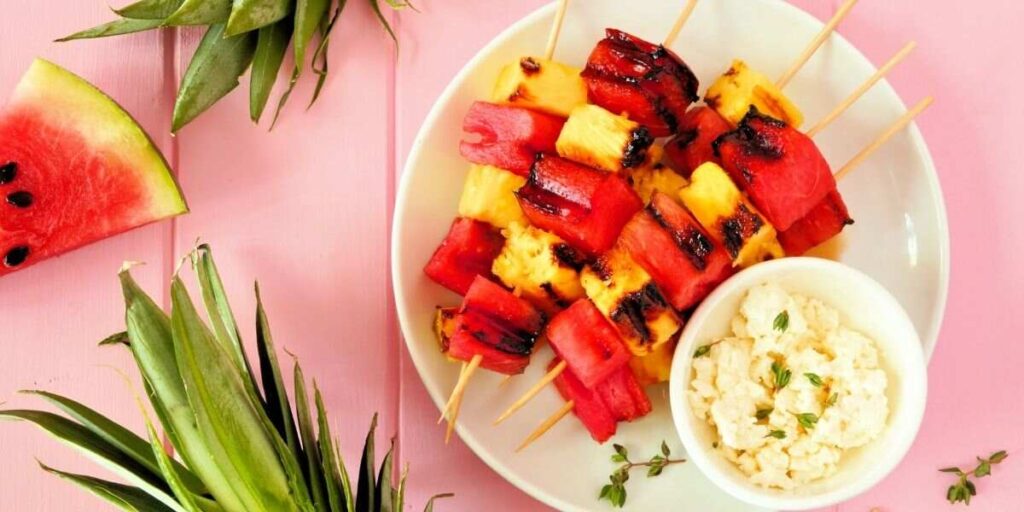
Themed kabobs make the whole thing feel intentional and special rather than just a bowl of fruit on a stick. Here are the most popular setups:
Presentation matters more than most people realize. Lay finished kabobs flat on a white plate or wooden cutting board and they look dramatically more appealing than piled in a bowl. For parties, stand them upright in a halved watermelon or a foam block covered in foil — it looks like a centerpiece and gets compliments before anyone even tastes one.
Once you've got the basics of how to make fruit kabobs down, the next step is figuring out which style fits your actual situation. There's no universally correct answer — it depends on the age of the kids, the occasion, and how much time you realistically have.
Here's a side-by-side look at the main approaches so you can choose without second-guessing:
| Style | Key Features | Best For | Prep Time | Kid Appeal |
|---|---|---|---|---|
| Classic | Mixed seasonal fruit, simple alternating assembly, no dip required | Everyday snacks, school lunches | 10–15 min | High |
| Rainbow | Color-coordinated fruit in ROYGBIV sequence | Parties, classroom treats, photo-worthy presentations | 15–20 min | Very High |
| Dessert-Style | Chocolate-dipped, whipped cream, or yogurt coating applied after assembly | Birthdays, special occasions, dessert tables | 20–30 min | Extremely High |
| Patriotic | Restricted to red, white, and blue fruit only | Summer holidays, cookouts, outdoor gatherings | 15 min | High |
| Mini Kabobs | Shorter skewers, 3–4 pieces only, blunt tips required | Toddlers, very young children, lunchboxes | 10 min | High |
Match your kabob style to the specific situation and you'll get a strong response every time:
You can make fruit kabobs up to 24 hours in advance if you store them properly. Assemble the kabobs, lay them flat in an airtight container, and refrigerate. Avoid using fruits that brown quickly — like bananas or apples — if you're prepping ahead. For best texture and appearance, make them the morning of and serve the same day. Keep any dip separate and add it right before serving.
Plastic skewers with rounded or blunt tips are the safest option for young children. If you only have wooden bamboo skewers, supervise closely and blunt the sharp tips with kitchen scissors before handing them to kids. For toddlers under 3, skip the skewer entirely and serve the fruit pieces in a bowl or on a plate with a toothpick for the adult to control.
The main culprits for browning are bananas, apples, and pears. Toss these fruits in a small amount of fresh lemon or orange juice before skewering — the citric acid slows oxidation significantly and doesn't noticeably affect flavor. Store finished kabobs in the refrigerator, covered or in an airtight container, until ready to serve. Most other kabob fruits like strawberries, grapes, and pineapple don't brown and don't need this treatment.
Yes, absolutely. You can serve the same fruit mix in a bowl, arranged on a plate, or threaded onto sturdy pretzel sticks as a fun and completely safe alternative. For very young kids, pretzel sticks are a smart substitute — they're short, somewhat blunt, edible, and easy to find. Cookie-cutter fruit shapes arranged on a platter also look great and require no skewer at all.
 |
 |
 |
 |

About Daisy Dao
Daisy Dao grew up in Honolulu, Hawaii, where coastal living and access to fresh local ingredients shaped her approach to home cooking from an early age. She has spent years experimenting with seafood preparation, healthy cooking methods, and ingredient substitutions — developing hands-on familiarity with a wide range of kitchen tools, techniques, and produce. At BuyKitchenStuff, she covers healthy recipes, cooking techniques, and ingredient substitution guides.
Check for FREE Gifts. Or get our Free Cookbooks right now.
Disable the Ad Block to reveal all the recipes. Once done that, click on any button below
|
|
|
|
